How to: Create a Beautiful Dragonfly with our Creative Cake System Mould

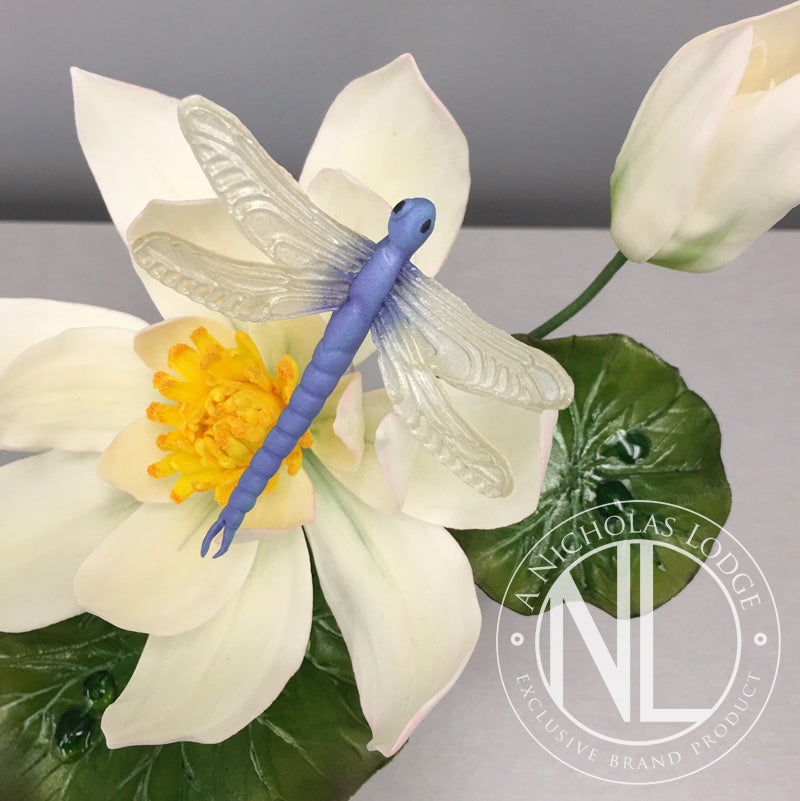
We were thrilled to get this step by step tutorial from Chef Nicholas Lodge. He has used the Dragonflies Mould from the Creative Cake System and made beautiful transparent gelatin wings! Pictured against his stunning hand made flower.
You can follow his easy steps to create gorgeous Dragonflies for your cakes, cupcakes or cookies below.
Intricately detailed the dragonfly mould is the latest addition to the Creative Cake System designed by International Sugar Artist Ceri Griffiths. It contains two dragonflies, in two sizes, two sets of bulrushes and river stones to help you build a scene.
You can purchase the Dragonfly Mould here
Step One
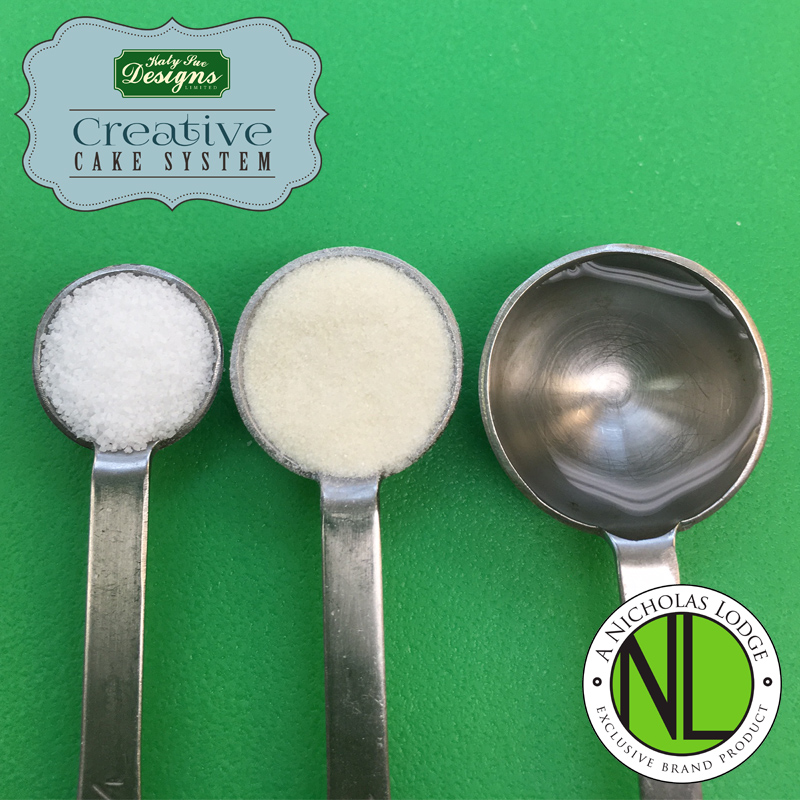
Start off with 1/4 tsp sugar , 1/2 tsp gelatin , 1 tsp water.
Step Two

Put in small microwave safe container, mix and let gelatin bloom for 2 minutes.
Step Three

You will need Dragon fly mould , pipette , pin and fine paint brush.
Step Four

Melt mixture for 10-15 seconds in microwave.
Step Five

Using pipette suck up the mixture and then dispense into the mould.
Step Six

Use pin for air bubbles and brush as needed note: keep mixture warm by placing in outer container with boiling water in like a water bath.
Step Seven

Fill all cavities if desired.
Step Eight

Remove smaller complete dragon fly after 3-4 hours.
On larger dragon fly I left wings overnight as if removed too soon they will curl, on small dragon fly it will curl as shown on finished photographs, but looks natural.
Step Nine

Take out the wings the next day.
Take a thin carrot of gum paste / flower paste I used Renshaws blue / hydrangea blue flower and modeling paste.
Step Ten

Press into the mould as shown so bottom half is level but top more dimensional.
Step Eleven

Take a24 g white wire and hook.
Dip into NL super bond and insert into the body, remove from mould.
Step Twelve

As soon as removed from mould dip wings into NL super bond and insert into the soft body.
Step Thirteen

Place into card former as shown to dry cutting the end of the tail with spring action scissors.

Here you can see the small dragon fly dusted with pearl on wings and blue luster on body, Finished with rainbow dust black food art pen.
Note : if wanting to make a total gelatin large dragon fly attach wings with the melted gelatin mixture in the former and let dry.

Comments
Leave a comment