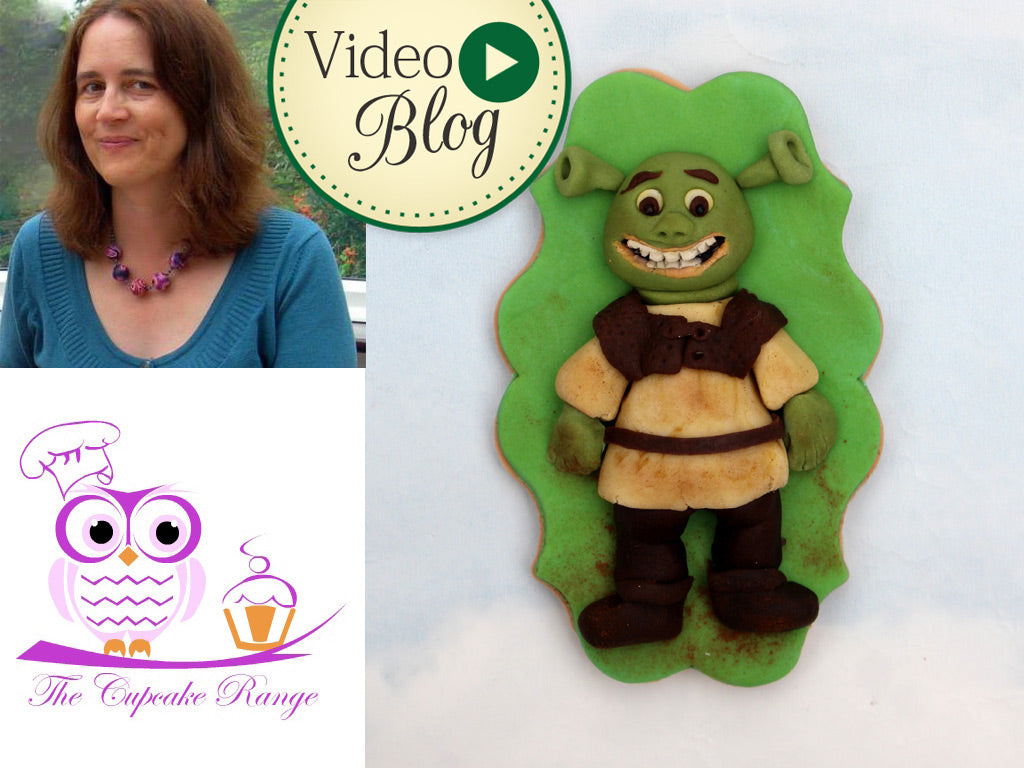
Shrek Cookie Video Tutorial by Sarah Harris

Watch this video tutorial and learn how to make your very own Shrek Cookies! Including a recipe for Cookies that keep their shape! Sarah Harris from The Cupcake Range has adapted our Sugar Buttons Snowman mould to create the perfect Shrek character.
You will need:
- KSD Sugar Buttons Snowman mould
- Cookie – approximately 10cm x 6cm in size covered in green fondant (see cookie recipe at the bottom of the page)
- Fondant – green (I used Lincoln green by Renshaws), white, black, brown, cream, flesh coloured
- Cocoa powder
- Cornflour to dust
- Ball tool
- Cone tool
- Cocktail stick
- Craft knife
- Dresden/leaf modelling tool
- Edible glue
To make the head:
Mix a tiny piece of brown fondant with some Renshaws Lincoln green fondant to get the right olive green colour for Shrek’s head, neck, ears and hands. I mixed 1g of brown fondant with 13g of green fondant. Dust the snowman mould lightly with cornflour and tap out the excess. Press approximately 4g of the olive green fondant into the head of the snowman mould. Remove from the mould and using a small ball tool indent both eyes. Add a tiny ball of white fondant for each eye, then a smaller ball of brown and then an even smaller dot of black fondant. Add two brown eyebrows. With a cocktail stick make two nostrils up through the nose. Shape the bridge of the nose with a Dresden tool. Open up the mouth using a Dresden tool and insert a tiny piece of black fondant into the mouth space. Add a tiny slither of light pink fondant at the top and bottom of the mouth to form the lips. Then add a row of white/ivory teeth to the top and bottom of the mouth.
Position the head on top of the cookie. Roll two small cone shapes for the ears (1g of olive green fondant should be enough for both ears) and insert a ball tool into the thick end of each cone. Position on the cookie as shown. Add a small olive green neck.
To make the body and clothes:
Make the legs from brown fondant (approximately 6g) using the legs from the Snowman mould and the two boots using black fondant (1-2g for both) moulded using the feet of the Snowman mould. Bend the legs round so they are in a standing position, smooth away any buttons that may have appeared and make the legs a bit longer by cutting part way into the middle of the lower tummy area as shown. Make the body from a piece of cream coloured fondant into a fat tear drop shape, then flatten or cut off the thin end so it fits onto the neck. Insert a cone tool into the fat end and thin the shirt so that it fits over the legs. Add the legs, boots and body to the cookie. Make two cream coloured arms using the arms of the Snowman mould. Insert a ball tool into the end of the sleeve to enable the hand to be inserted. Make two hands using olive green fondant and the hands of the Snowman mould (1-2g should be enough) using a craft knife to make the fingers and thumbs. Position the sleeves onto the cookie and glue the hands in place. Make a thin strip of brown fondant for the belt and two L shape pieces of brown fondant for the waist coat. Glue in place. Dust the bottom of the cookie and the tunic with cocoa powder to represent dirt from the swamp.
Cookies that keep their shape
Makes about 25 medium-sized or 12 large cookies
- 200g unsalted butter at room temperature
- 200g caster sugar
- 1 medium sized egg, lightly beaten
- 400g plain flour, plus more for dusting
Optional flavours
- For vanilla cookies, add 1 teaspoon of vanilla extract
- For lemon cookies, add finely grated zest of 1 lemon
- For orange cookies, add finely grated zest of 1 orange
- For chocolate cookies, replace 50g of the plain flour with 50g cocoa powder
Method
Cream the butter, sugar and chosen flavouring until well mixed and just becoming creamy in texture. Take care not to over beat or the cookies will spread during baking.
Beat in the egg, then add the flour and mix until a dough forms. Gather it into a ball, wrap it in cling film and chill it for at least 1 hour.
Place the dough on a floured surface and knead it briefly. Roll it out to an even thickness.
Use cookie cutters to cut out the desired shapes and, using a palette knife, lay these on a baking tray lined with greaseproof paper. Chill again for about 30 minutes and preheat the oven to 180C/160C fan/350F/gas 4.
Bake for 6–10 minutes, depending on size, until golden brown at the edges. Leave to cool on a wire rack.
Sarah Harris, The Cupcake Range
Leave a comment