
Autumn Birdhouse Cake Tutorial by Gilles Leblanc
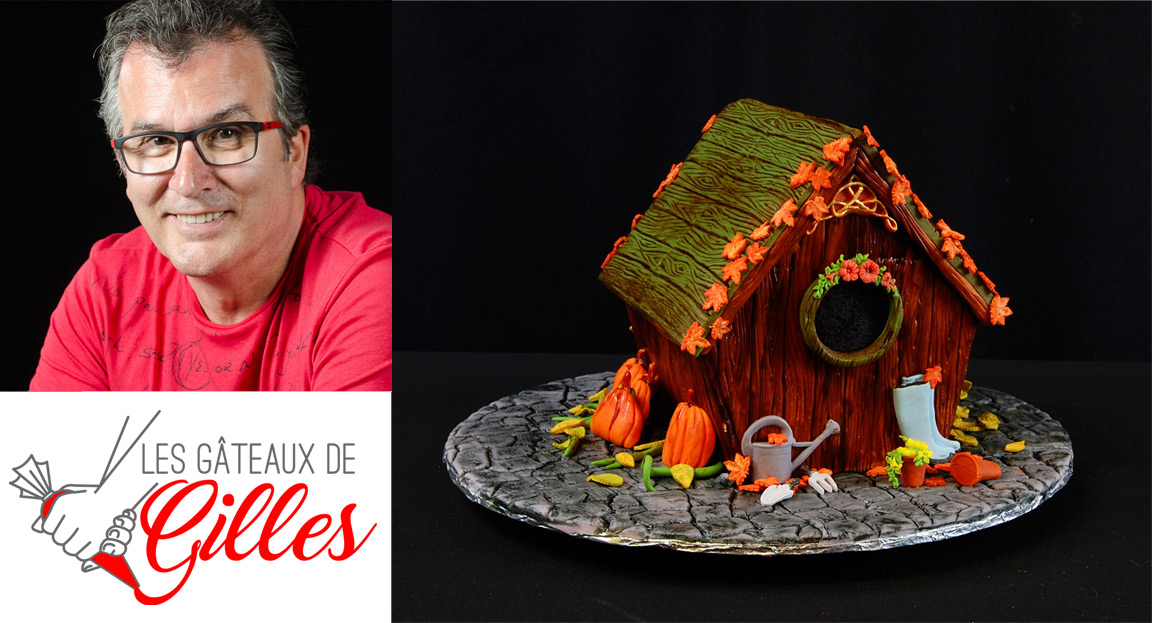
Gilles Leblanc from Les Gâteaux de Gilles has put together a very helpful step by step tutorial using a selection of our moulds to make an Autumn Birdhouse cake. We love this idea and hope it inspires you to make your own Birdhouse. Gilles Facebook page is – Les Gâteaux de Gilles
Step 1
 To make this cake I made an 8 X 12” vanilla cake, any recipe would do as long that it is not too light.
You will also need a nice thick chocolate ganache. I prefer to use a chocolate ganache instead of buttercream; because it gives me a sturdier cake to work with and the taste of the cake and the chocolate is sublime.
I have cut out some templates of the front and back of the birdhouse out of a plastic place mat. This will allow me to achieve the perfect shape desired.
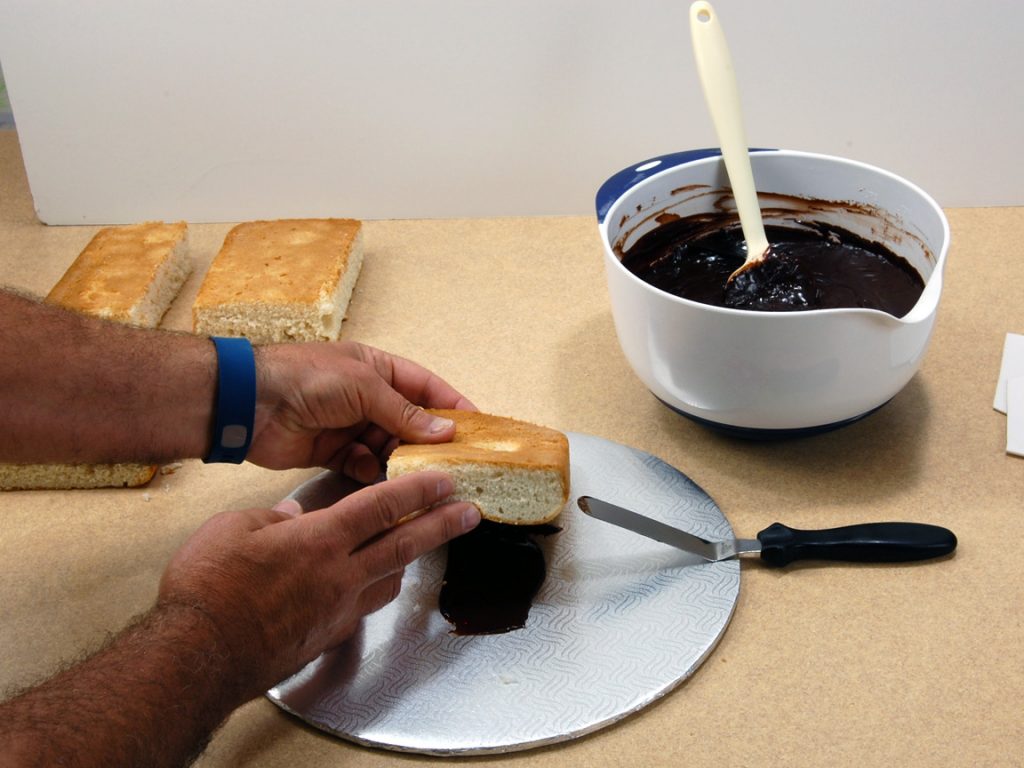
Step 2
 As shown on this photo. I have sliced the cake in different sizes to match the shape of the template.
Step 3
 Now let stack it up. Using some ganache I will adhere the first layer to the board.
Step 4
 Then with some more ganache I will add the other layers.
Step 5
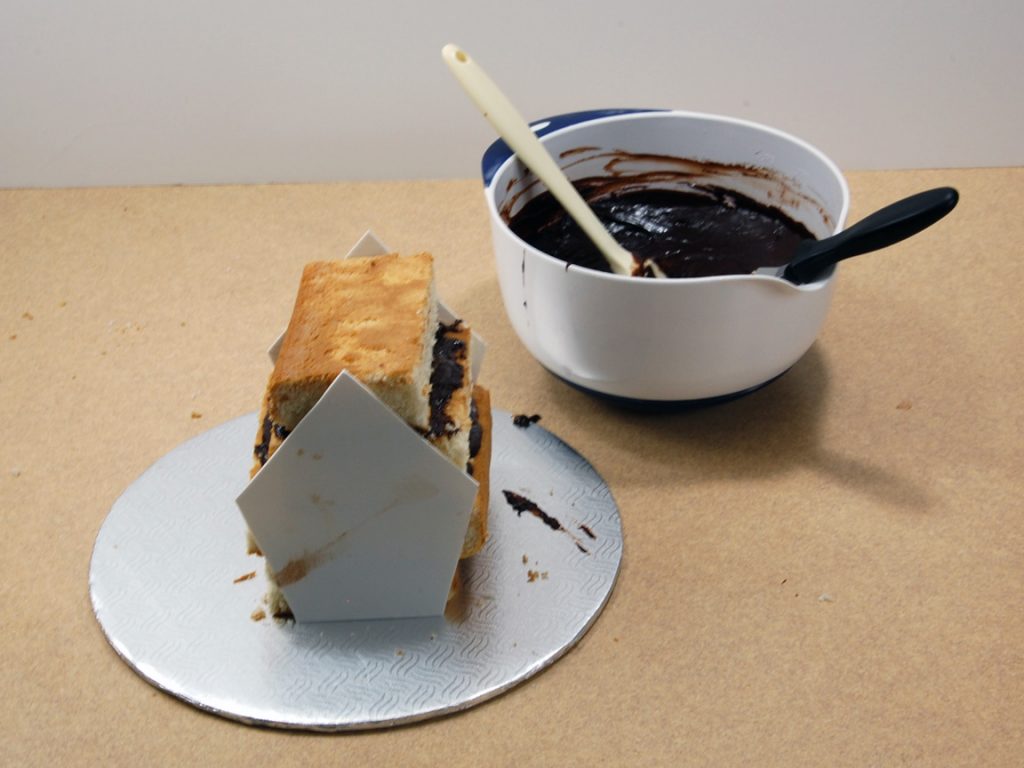 Making sure that the cakes are well stacked, I “glued” the template to the cake with just a tad of ganache. At this point I will put the cake back in the refrigerator so that the ganache solidifies.
Step 6
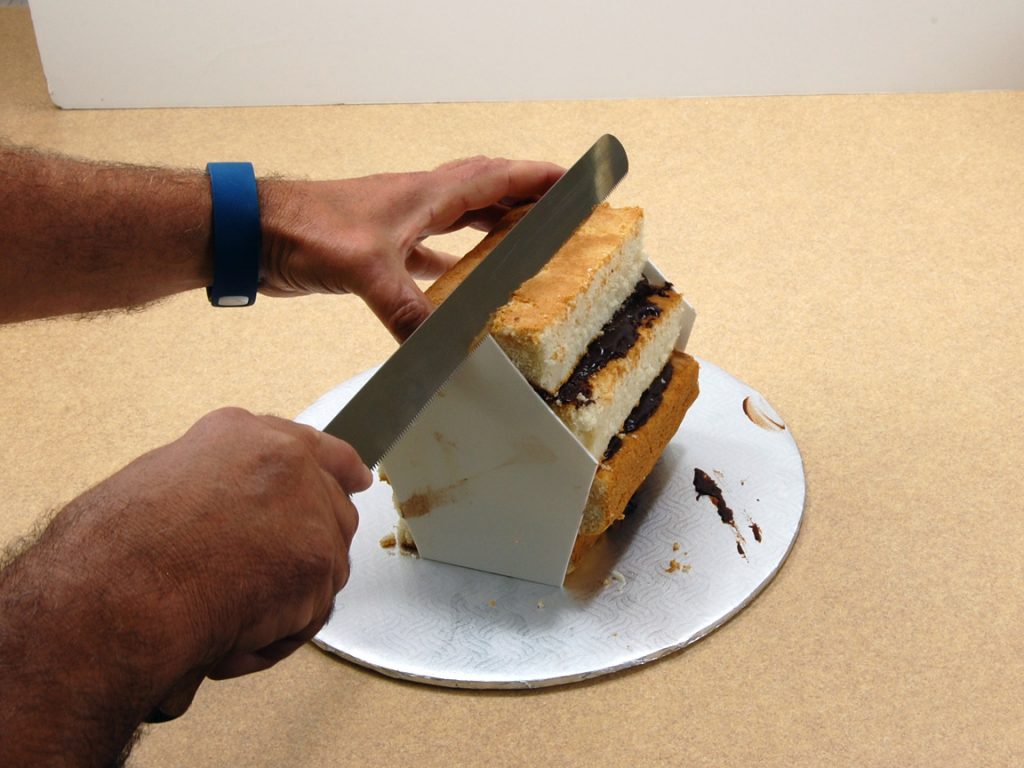 Now is the moment to slice off the excess cake on one side.
Step 7
 Before slicing the other side I will move the template and give space for the ganache to cover the side and then cut the rest of the cake.
Step 8
 Once again I put the template in its final place so that I have a space on both sides to fill with chocolate ganache.
Step 9

Time to cover it with ganache. Having both templates in place, I just have to fill the space left.
Step 10

Using a spatula, (that will touch both templates) let’s smooth the excess of ganache.
You might have to do this step a few times until the ganache solidifies and all the gaps are filled in.
Step 11

See how perfect it comes with the template in place and look at those sharp angles.
Step 12

Now to remove the template. I use a nylon fishing wire and slide it between the cake the template.
Step 13

With the template removed we only have to fill the front and back of the cake. At any time you can put the cake back in the refrigerator to allow the ganache to solidify faster.
And there you have it! A finished cake ready to be covered in fondant.
Step 14

When doing such a project and working with chocolate ganache, I always prefer to cover the cake with a thin layer of fondant. That way it gives me a better base for all the decoration that I want to add and try them first without damaging the ganache or dirtying my fondant pieces.
Step 15
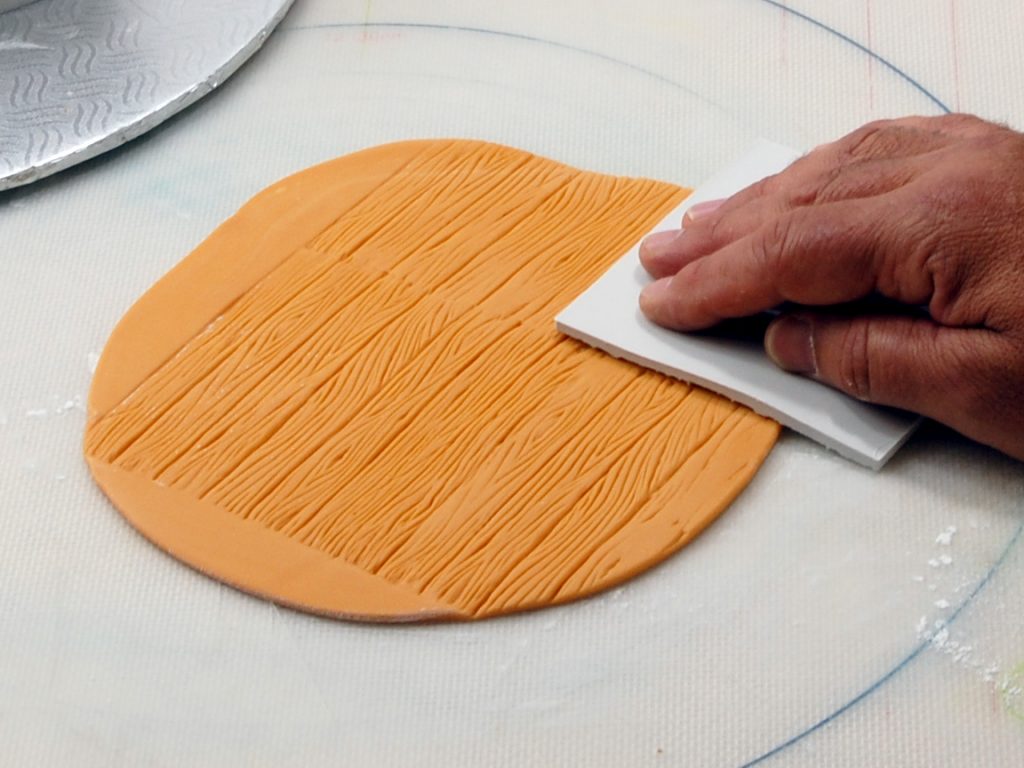
Now let the fun begin. Using the wood panel mould, I will imprint the fondant. Notice if your piece is bigger than the mould, you could always align and repeat the pattern. Just be careful not to put too much pressure where you the mould end. That way you will have certain continuity.
Step 16

See how easy it is when your cake is already covered in a thin layer of fondant? You can just lay your pieces and see how they fit before gluing them.
Step 17

Using the same process as for the front and back of the birdhouse, I stamp a long piece of fondant to cover the sides of the cake.
Step 18

At this point it is easy to paint the wood panel to give them some shade.
Just to make sure that we have the right colour, let’s make a test on a small piece of textured fondant to confirm that we have the desired colour. Then we can paint the cake.
Step 19

Since we will be putting a roof on it, let’s create some thickness by adding some thick pieces of fondant so that the roof panel will be overlapping the house.
To do this roll a thick piece of fondant and give it the same texture using the wood panel mould. Then cut them in equal strips and glue them to the contour of the roof as shown in the photo and paint it the same colour as the house.
Step 20

At this point it is easy to add a small corner detail at the angle of the roof. Using the decorative corner mould, I made a small corner to add some detail to the house.
Step 21

Covering the roof. Using the same wood panel mould, make some textured fondant pieces to cover the roof. Place and align your piece of fondant starting from the top angle of the roof and cut the excess fondant on the side and bottom.
Step 22

Shading the roof. Using the same color as for the side, paint the entire roof and then with a damp cloth, gently remove the excess paint to reveal the wood grain and the colour of the roof.
Step 23

The birdhouse entrance. To make this, roll a thin layer of black fondant. Then roll a thick layer of fondant the same colour as the roof. Cut the thick layer of fondant using the smaller circle cutter, then glue your piece of fondant with the hole in it, onto the black piece of fondant. Then cut out a larger opening using the bigger circle cutter to give you an opening for the door. Don’t forget to do the shading on it like you did for the roof.
Step 24

Let’s add some detail to the back. Using the Trellis fence mould, make a piece that will cover the back part of the birdhouse. I had to remove a section at the bottom so that it would fit properly on the cake.
Step 25

Covering the cake board. Using the stone design mat mould, make an impression on a big piece of fondant.
If you notice I have overlap the imprint like I did for the wood panel. Be careful not to put too much pressure on the edge of the mould. This gives me a continuous pattern.
Then, cut out the pieces that you need to cover your board. The seam that you will create could be easily erased with a shaping tool.
Step 26
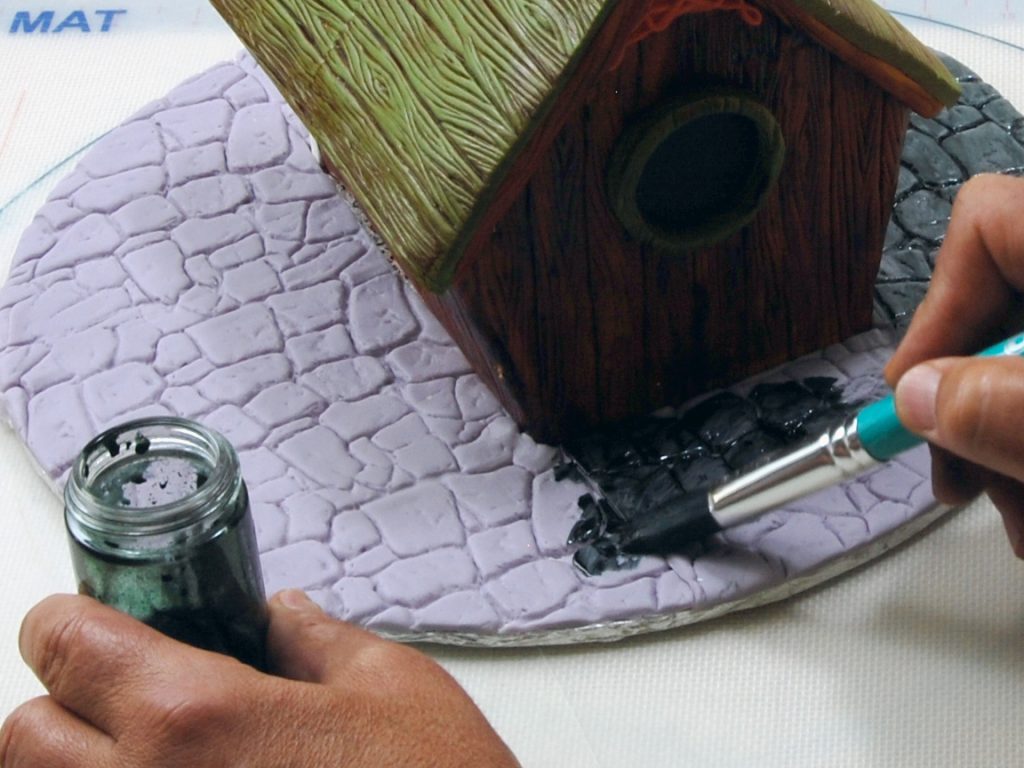
Shading the stone work. Using some black food colour mixed with some vodka, apply a thin coat of colour and use the same technique we used for the roof. Remove the excess with a damp rag.
At this point you could let the colour dry before touching the rest.
Step 27

Making some leaves. While the cake board is drying out, make some leaves using the Rose Leaves mould.
Apply some gumpaste inside the mould. I used the smaller size leaf. When removing the leaf from the mould you could give them a small curving effect. I like to prepare those in advance so that they have time to dry. To colour the leaves choose the shade of petal dust that you desire and put some in a plastic bag. Then put the dry leaves inside and gently shake the bag so that every leaf is coloured equally. Using a small strainer empty the bag into it and remove the excess petal dust over a paper so that you can recuperate the dust. Then slightly dust every leaf with some green petal dust. This will make the vein texture pop and makes it look more like they have changed colour from green to yellow.
Step 28

Attaching the leaf to the fence. Using some edible glue attach each leaf to the fence in a random pattern.
Step 29

Adding some small detail. Using the garden accessories mould and the design hat mould. You can make all these small details from the flower pots with flowers inside to the gardening tools. When doing the strand of flowers that come from the hat mold, I like to just do a fast impression of it, to be able to see all the details and where the flower are placed, so that I could do them in different colours. As for the gardening tool I find that making them out of grey gumpaste and painting the handle black is much easier.
Step 30

Adding some detail to the front. For this side I have used the garden accessory mould and the maple leaves mould. For the maple leaf I did the same process of making them earlier so that they could dry and curved some of them as I am took them out of the mould. Then I placed them in a plastic food bag with some petal dust and brushed them with a different shade to colour them. Apply them randomly on the roof and on the ground. The rubber boots were made with fondant and the extremities were painted with black food colour.
Step 31

At this point I painted the detail of the angle corner with some gold paint.
Step 32

Pumpkin patch. Use the pumpkin face mould to make the pumpkins. After molding them, just gently shape and distort them to a different shape. Place them randomly against the cake. Then roll yourself a small piece of fondant to create a vine and glue some of the leaf on it. Add a little shading on the pumpkin and there you are, your cake is finishes. Actually, you could let your imagination run wild with all the things that you desire to add to this birdhouse. The limit is your imagination!


Leave a comment