
Ornamental Moulds Peacock Project by Karen Seal
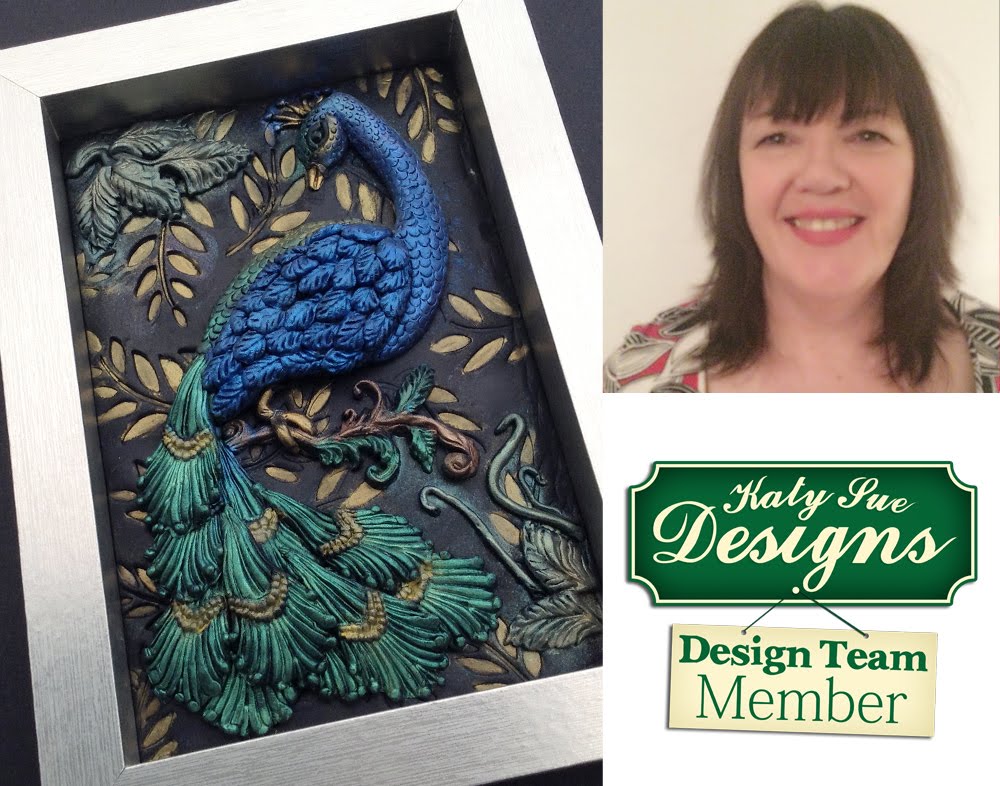
For this project I used polymer clay which you cook in your own oven following instructions on the packet. Polymer can damage work surfaces so I suggest you work on a glass or ceramic tile. Choose a deep picture frame for this project, I’ve chosen a 4×6 inch and removed the glass (you will build your picture on this glass).
You will need:
- Black polymer clay
- Mica powders, blue, green, gold,
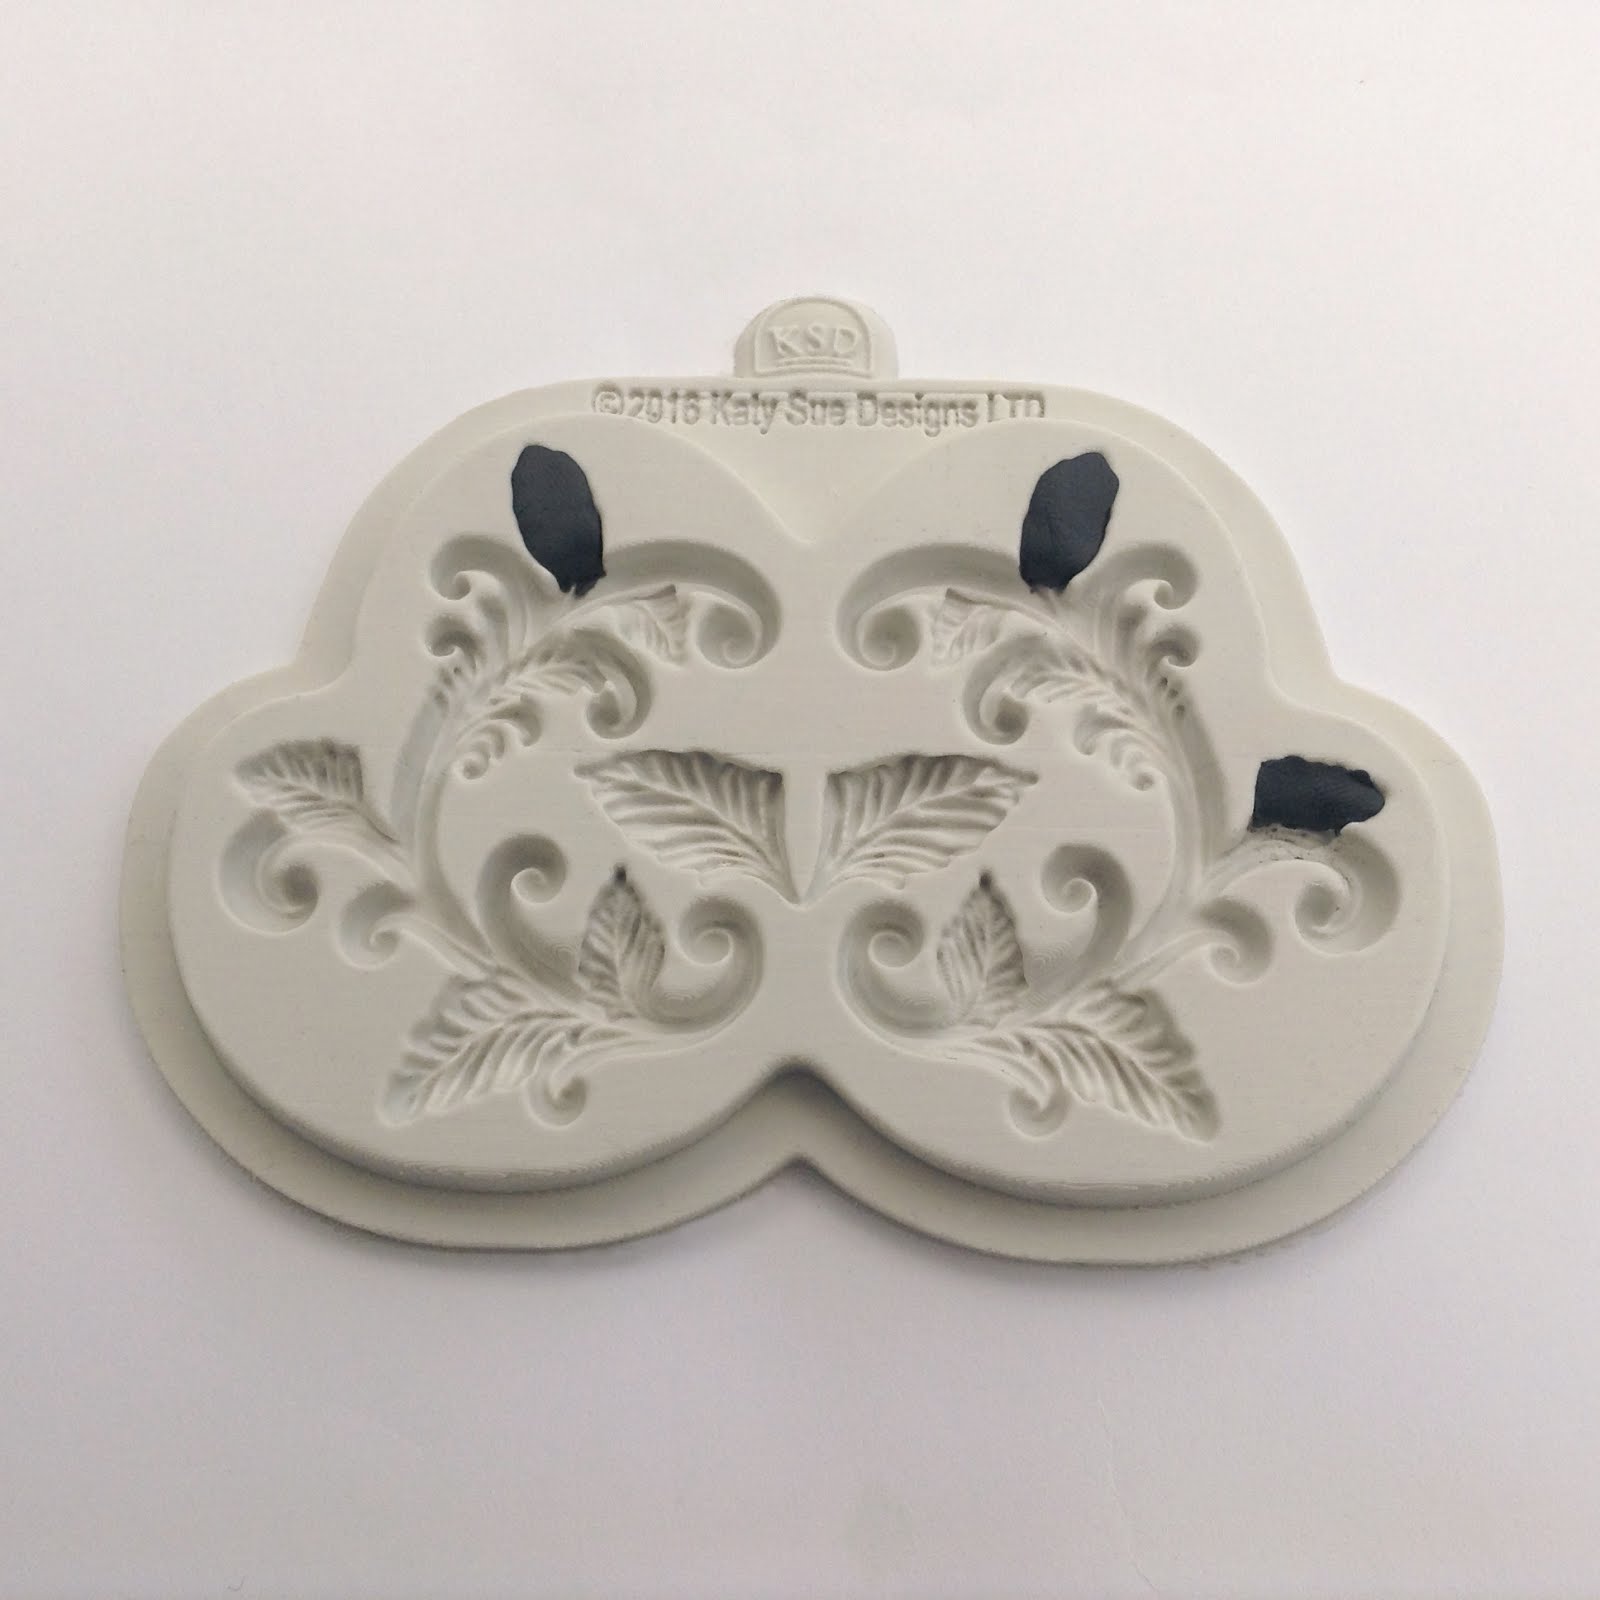
- Katy sue moulds – Ornamental Drops, Leaf Flourish and Leaf Swirl
- Small glass bead
- Needle tool and 2 different sized straws
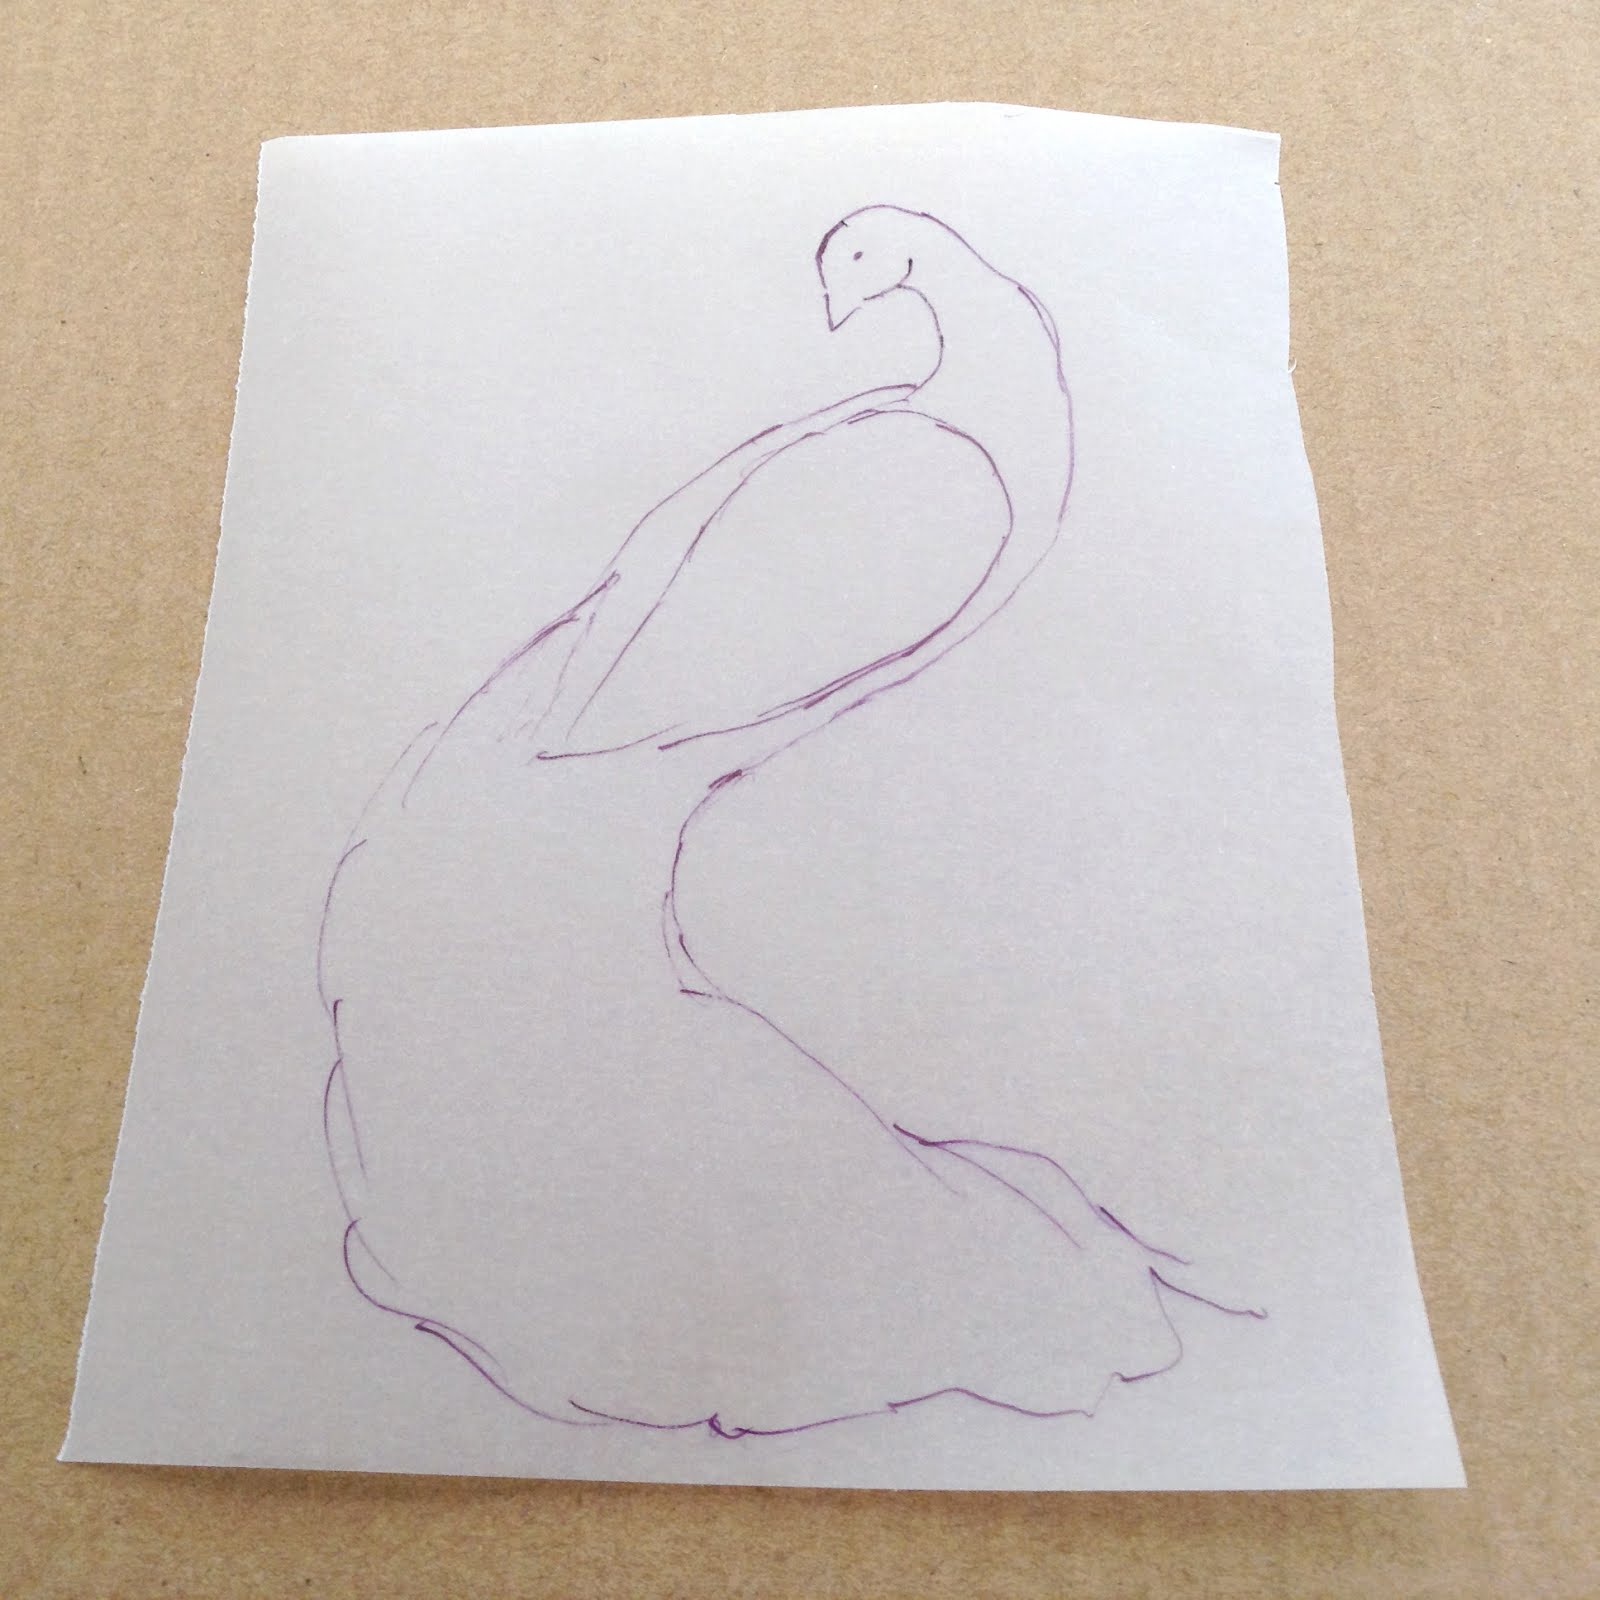
Step 1
Draw a rough outline of a Peacock so that it will fit within the frame. If you are no good at drawing you may be able to get some royalty free clip art from the Internet. Place your picture beneath the glass and use it as a guide for building your Peacock.
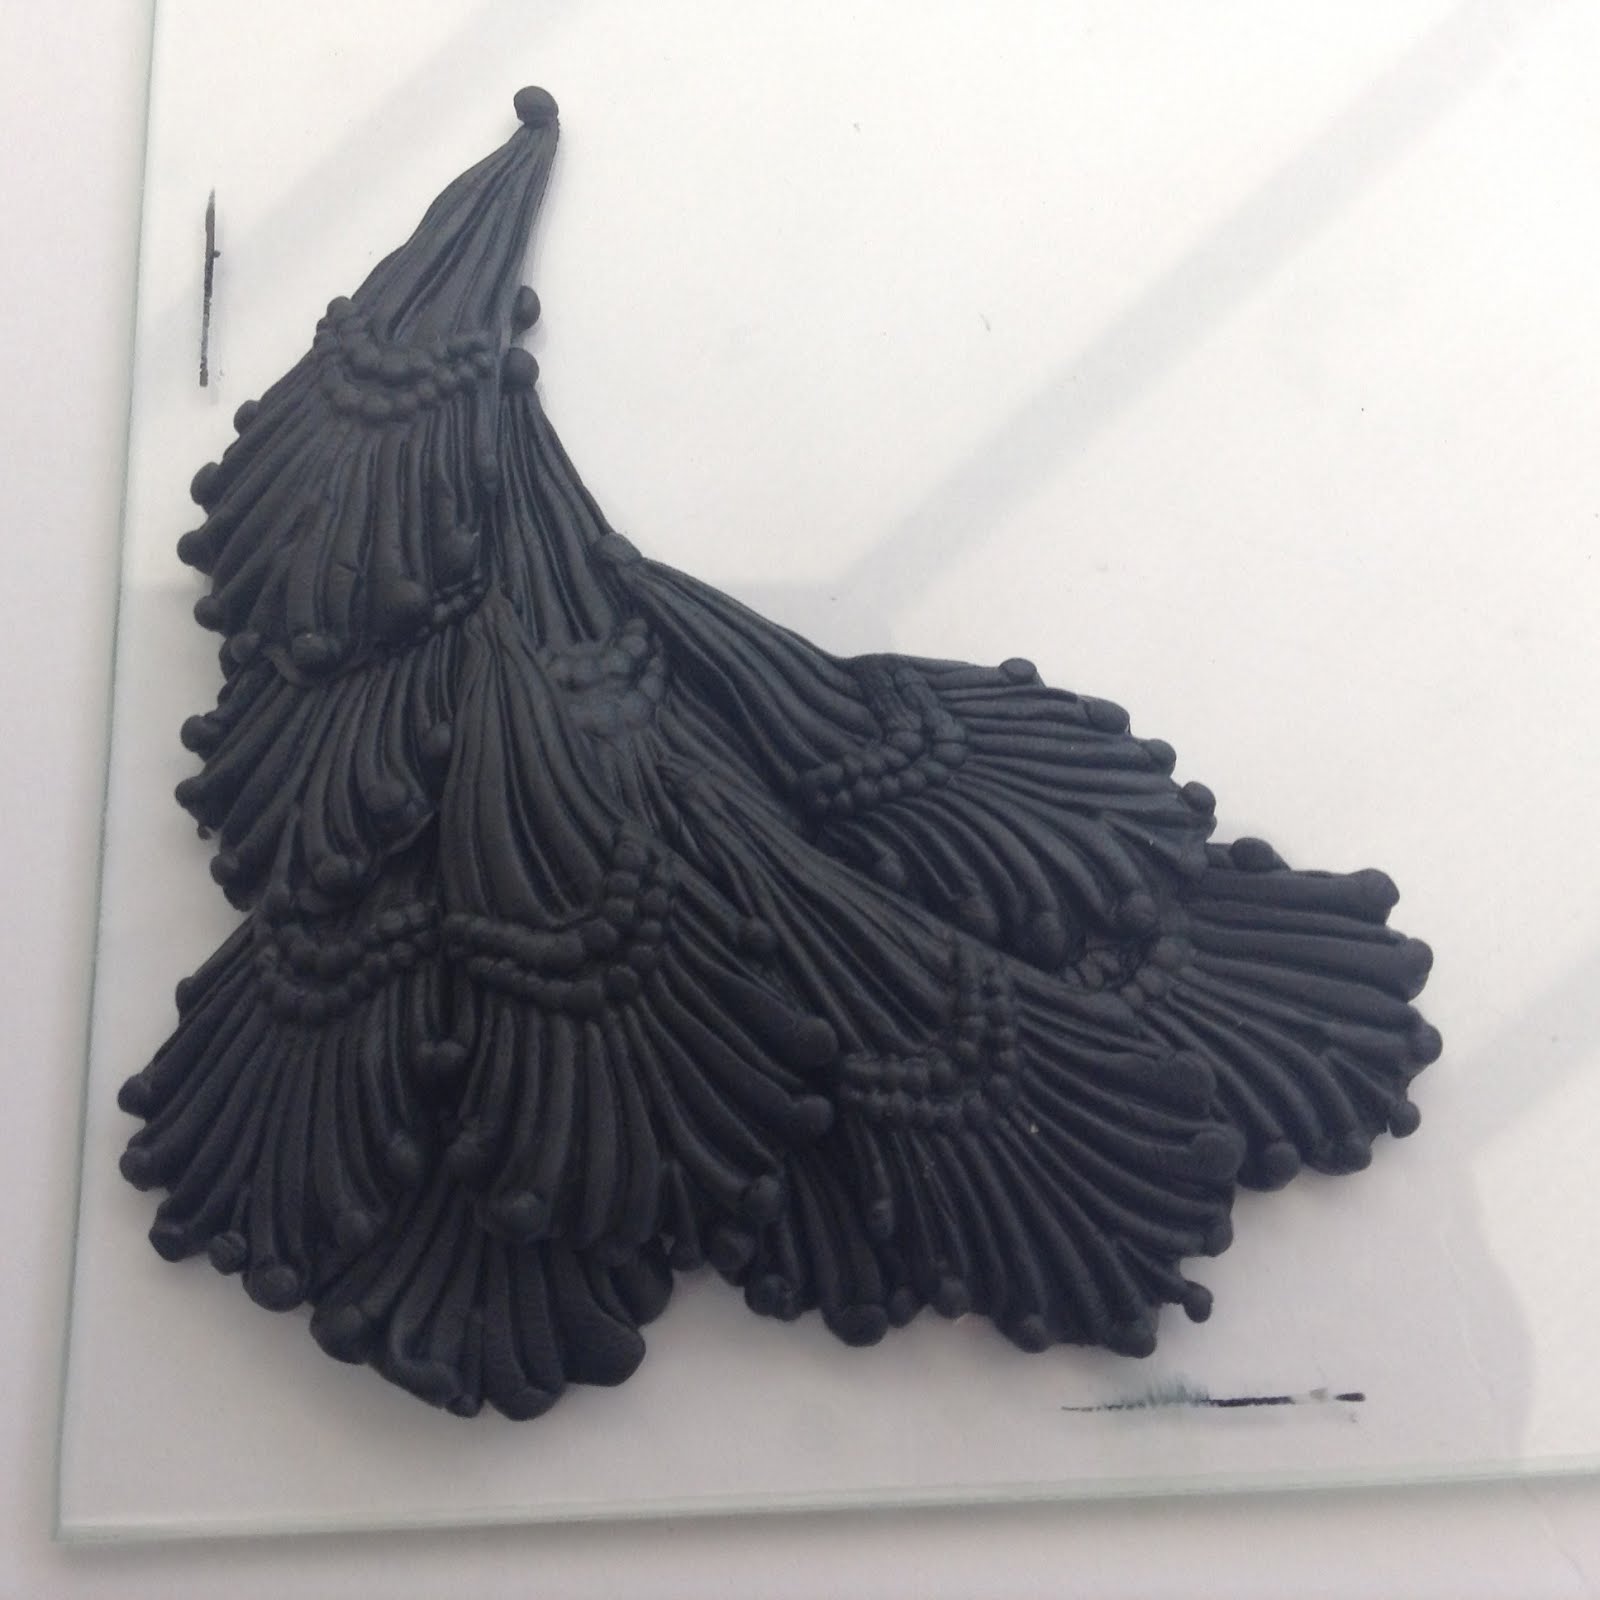
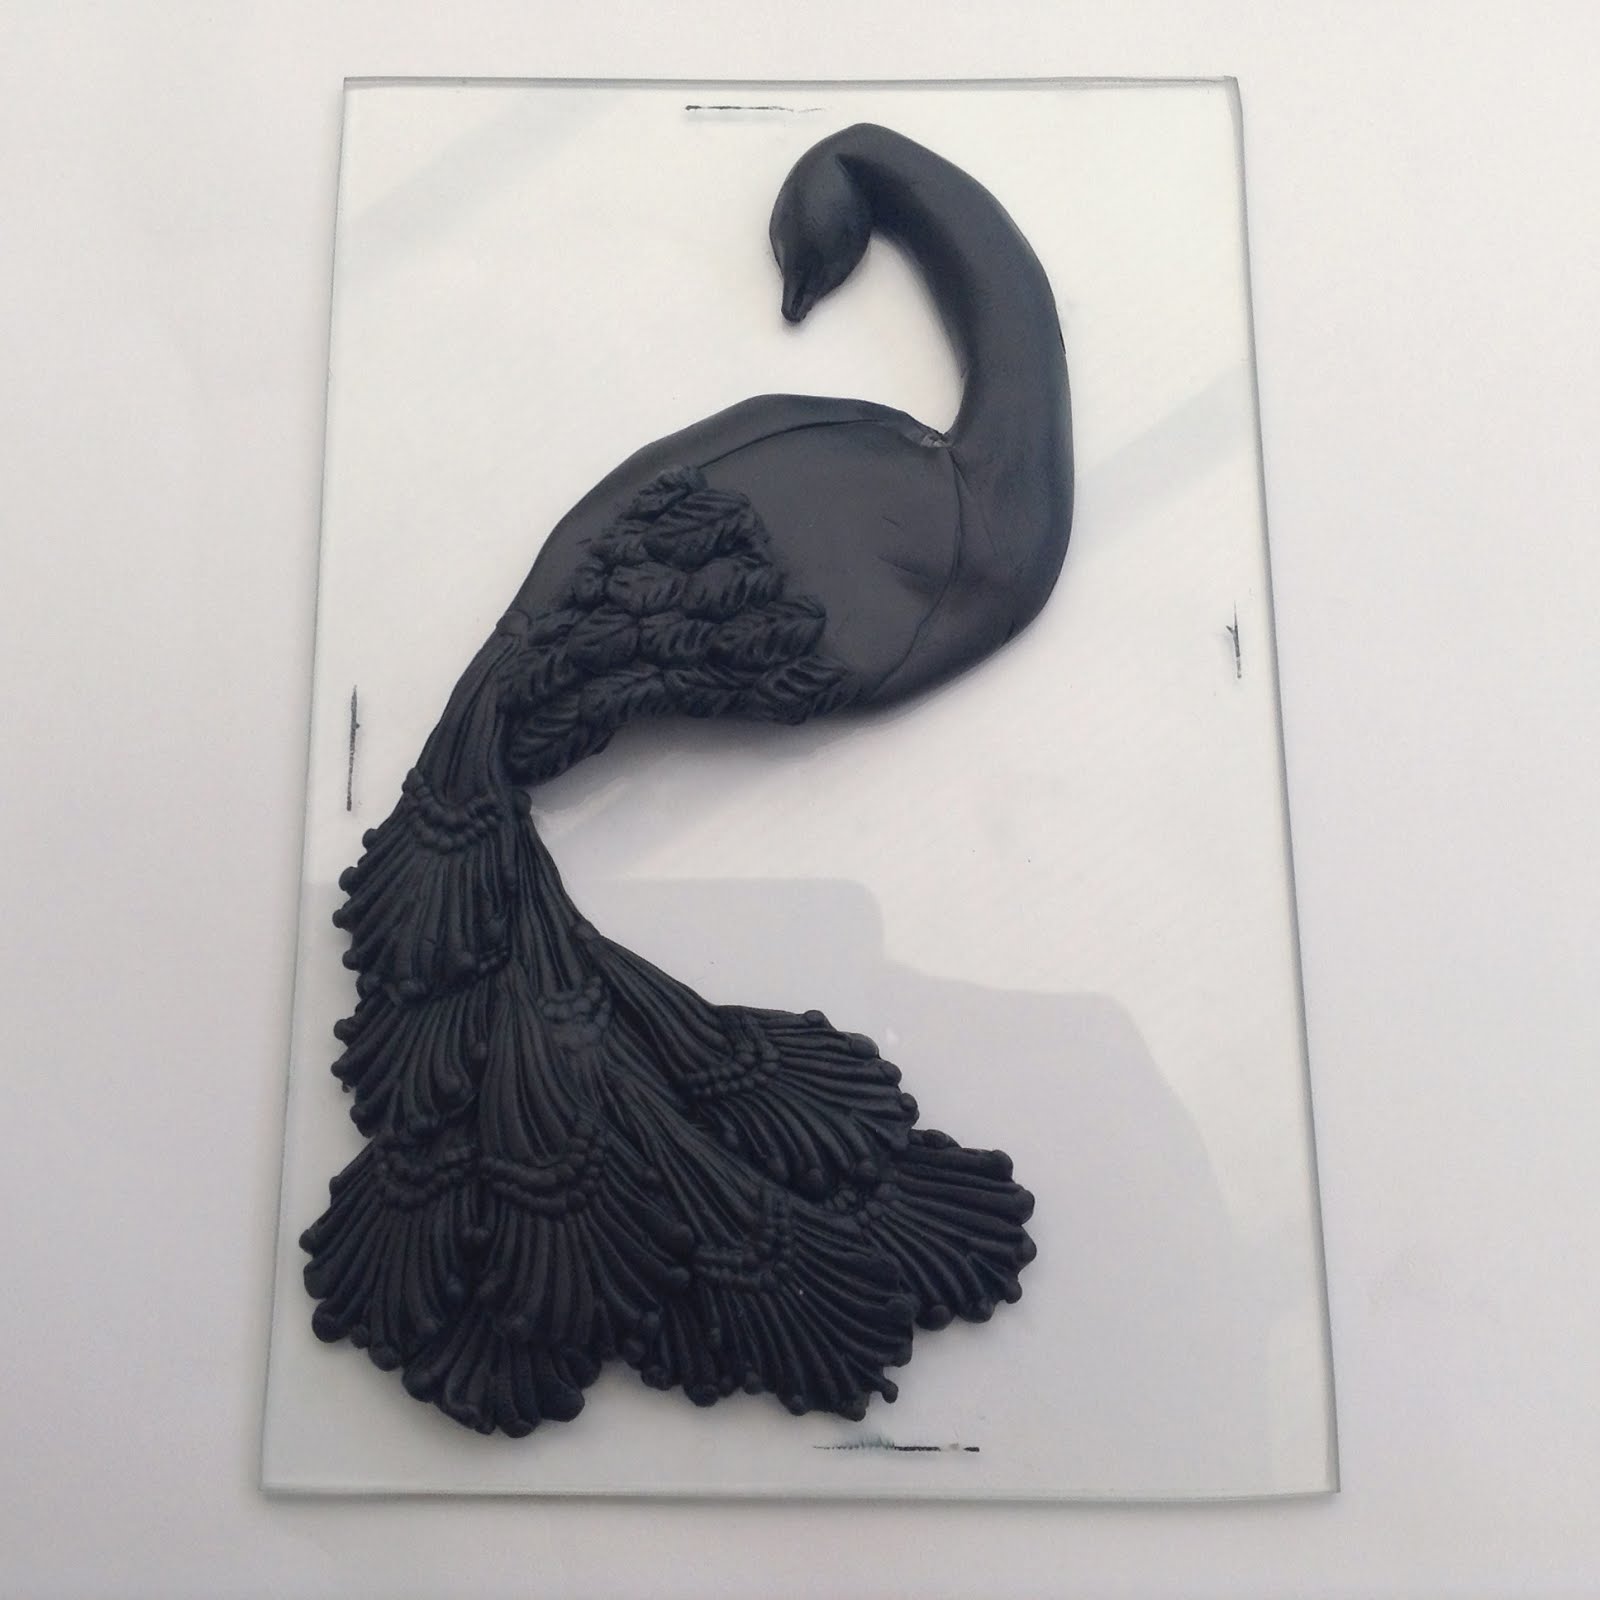
Step 2
Here you can see I have used the Ornamental Drops mould to make about 10 to 12 droplets. Arrange them to make the tail, starting from the bottom and working up the tail. Make sure you leave a small gap around the edge of the glass so that it will fit back into the frame.
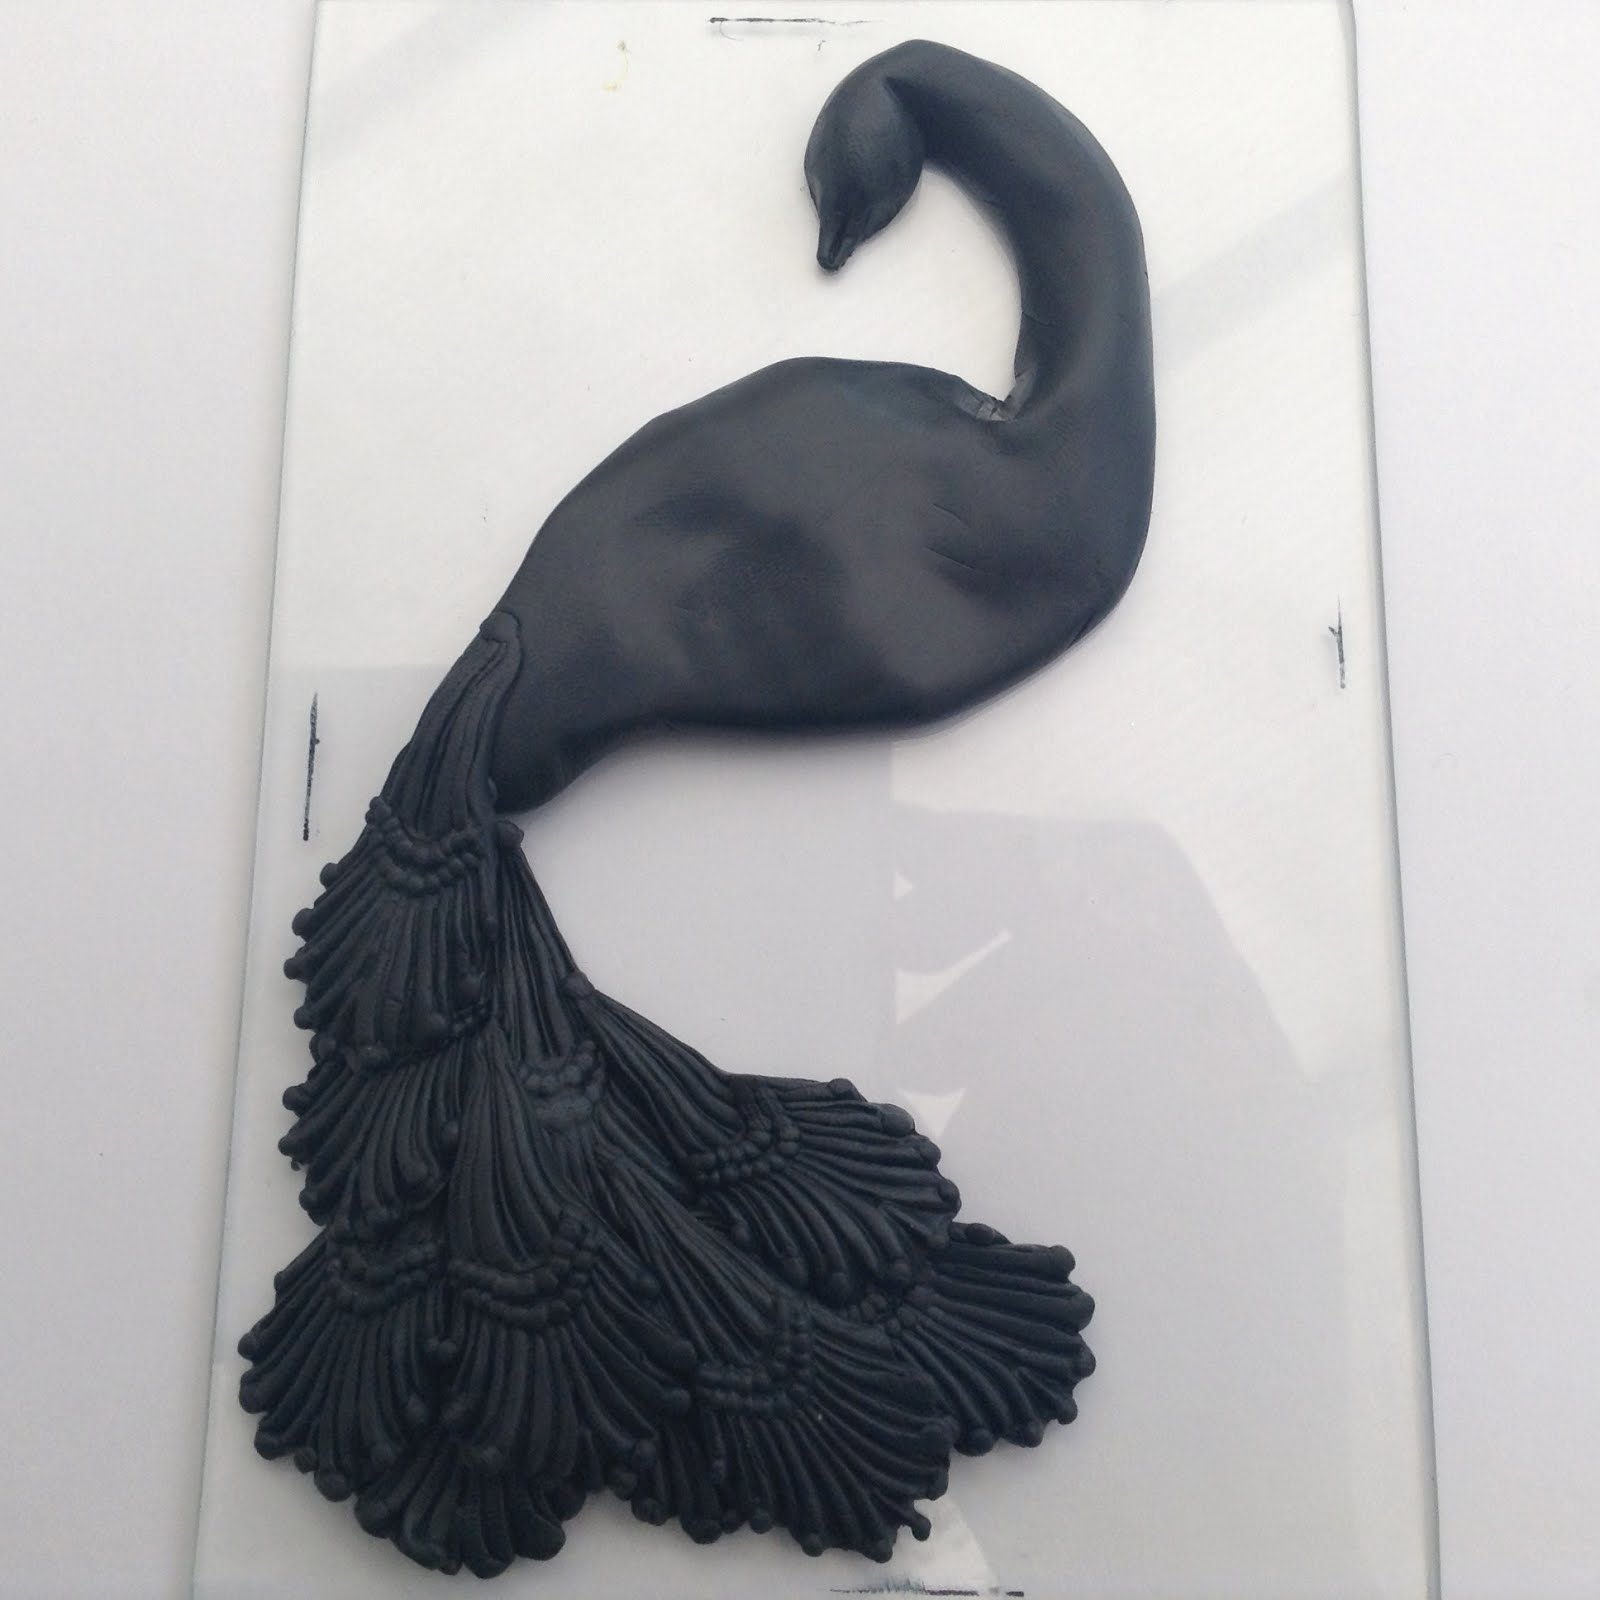
Step 3
Using more polymer clay and with the drawing still below the glass build up the body, neck and head of the bird. Mark out the area of the wing.
Step 4
Using the Leaf Flourish mould make some feathers for the wing. You can see from the picture which 3 leaves I used.
Step 5
Place the leaves within the area of the wing to simulate feathers. I then used two different size drinking straws to make the texture on the Peacocks body. Use a small glass bead for the eye and roll two tiny snakes of clay around the eye to keep it in place. Use a needle tool to mark the beak. If you want you can give the Peacock some fancy feathers on his head.
At this point I ran a tissue blade under the bird to carefully lift the Peacock off the glass. Place him safely to one side whilst you work on the background.
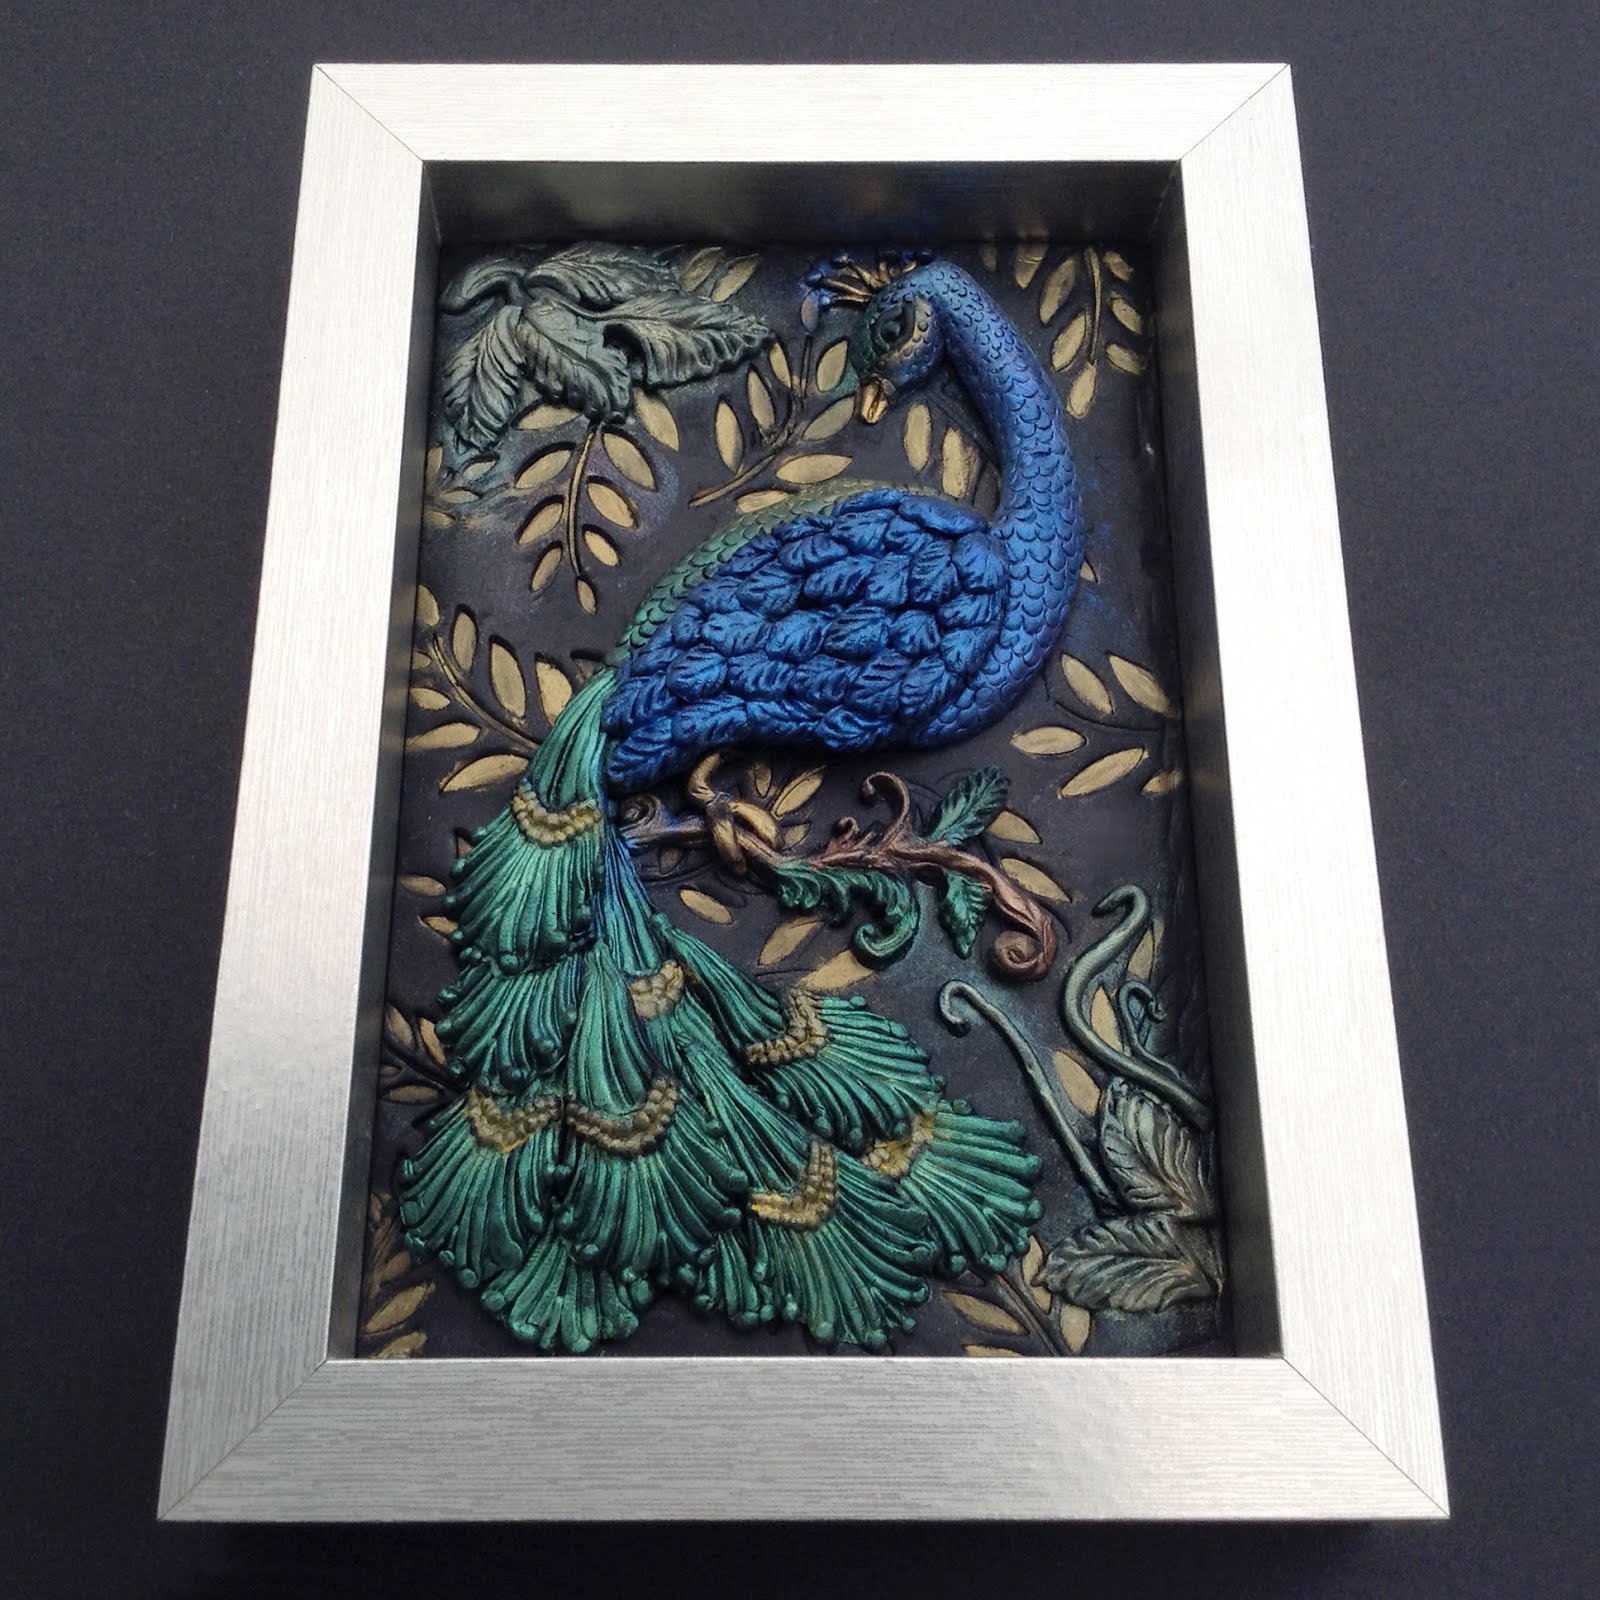
For the background you need to roll out a thin sheet of polymer, either with a rolling pin or using a pasta machine (one which is intended for use with clay). This sheet then needs some texture, which can be done manually or with the use of rubber stamps or embossing folders. You may need to spray the clay with a little water first to act as a release and stop your stamps etc sticking.
Once textured place this clay sheet back on the glass and cut to size. Remember to leave a small border around the edge. Carefully place your Peacock back in place and press him down a little to stick. Now you need to make him a couple of legs and I used the Leaf Flourish mould to give him a branch to sit on.
I also used the Leaf Swirl mould to give some interest to the corners. At this point you can roll some clay to fill in blank areas with vines and you could add flowers if you wish.

Step 6
Using the mica powders carefully brush the Peacock and the background to give colour.
Finally bake using the instructions on your polymer clay. For me it was 30 mins at 110 degrees in a fan oven.
When the time is up, open the oven door but do not touch the glass until it is fully cooled. Lastly replace your glass back into the photo frame. The clay should stick to the glass but if it comes loose, glue with some superglue.
Hope you enjoy making this as much as I did.
You can see more ideas from our Design Team on our Facebook page https://www.facebook.com/KatySueDesigns
Leave a comment