Die Cut Paper Flowers & Leaves
This fabulous project will leave you with gorgeous 3D paper flowers that are bursting with colour. Perfect for card making, seasonal décor or 3D art, you can do just about anything with these beautiful blossoms.
Our die cut flower packs are hugely versatile, letting you mix and match colours, styles and shapes. You can even use the waste sheets as stencils once you’ve popped the flowers out. If you’re feeling adventurous, you can add your own colours to the petals, stamp a pattern on top, or use embossing powders and heat set.
In this video, Jak Heath takes you step-by-step through the surprisingly simple process of paper flower making. This project is suitable for beginners and advanced crafters alike. Watch the video and follow the steps below.
What you'll need
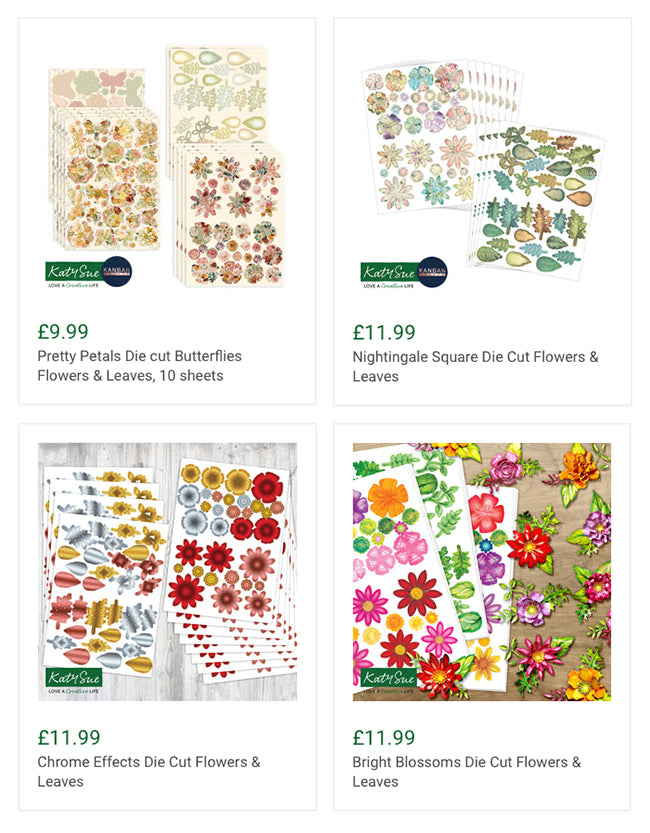
First, choose your Die Cut Flower kit. For this demo, Jak used Icy Watercolours Die Cut Flowers:

Icy Watercolours Die Cut Flowers (12 pack)
£11.99
These watercolour die cut flowers and leaves will add beautiful 3D details to your cards and crafts. With 380 individual elements you can experiment with different colour combinations.

But if you want to try something different, check out our bold and beautiful alternatives:
 You'll also need...
- A high density mat or similar
- A ball tool
- A pair of tweezers
- Glue
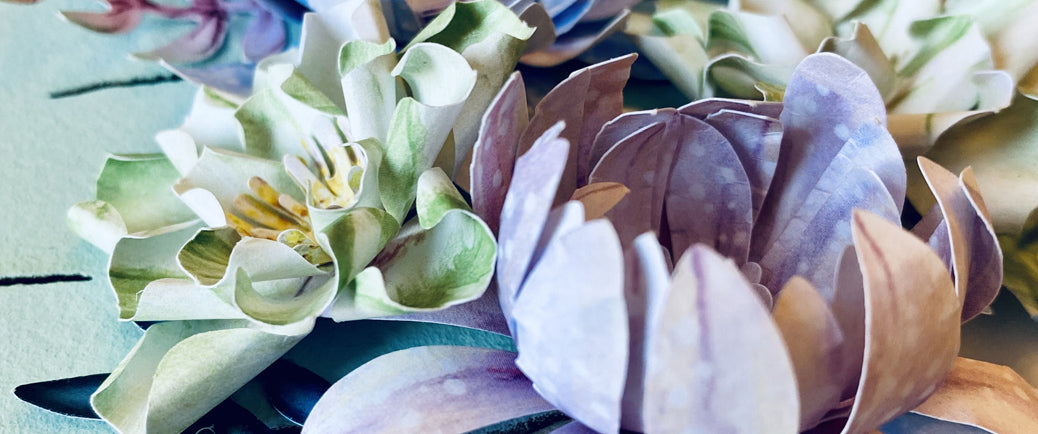
Here's a sneak peek at the how the finished result might look:

Step one: Selecting your flowers
Release the flower shapes from the sheet using the ball tool or pop out carefully by hand.
The daisies come in three sizes on each sheet – small, medium and large. Take two large, one medium and one small flower.
Step two: Shaping the flowers

Place one of the large flowers on the mat. Using the ball tool or the back of your tweezers, apply a little pressure to one of the petals, pulling the tool all the way from the tip of the petal towards the centre. Repeat with the other petals.
Doing this will curl up each petal. The more pressure you apply, the more the petal will curl.
This is your base flower, so once you’ve shaped the leaves, turn it over so the petals are curling towards the mat. Open it a little, and roll the ball tool around the centre of the flower.
Repeat the same process with the remaining flowers, but do not turn them over to shape the centre. Instead, leave the petals pointing upwards, forming a cup shape.
Step three: Preparing the centres of the flowers

Now you’re ready to prepare the centres of the flowers.
Take three of the centres in different sizes. Shape them by rolling the ball tool around the middle of each one.
The outer edges will curl up slightly.
Step four: Building the flowers

Place a dab of glue at the centre of your large base flower. Place the second large flower at its centre, ensuring that the top petals are positioned in between each of the underneath petals.
Open the petals slightly to add the next layer. Remember to space the petals between each layer. Hold down until the glue has secured it.
Step five: Gluing the centres

Lastly glue the middles of the flowers in place, one on top of the other, until stuck securely. Here’s where your tweezers will come in especially handy – the smaller centres can be a bit fiddly to apply by hand.
You can now push the petals in towards the middle of your flower.
Step six: Finishing touches

Now you can use your beautiful leaves to finish the flower. And just like that, you have a beautiful flower embellishment! Remember, you can experiment by adding additional colours to the petals and leaves if you really want to flex your crafting talents.
This is one of three of the techniques shown in the video. Keep watching for more ideas, tips and tricks!
Comments
Leave a comment