Skip to content
🚚 FREE UK DELIVERY on orders over £30!

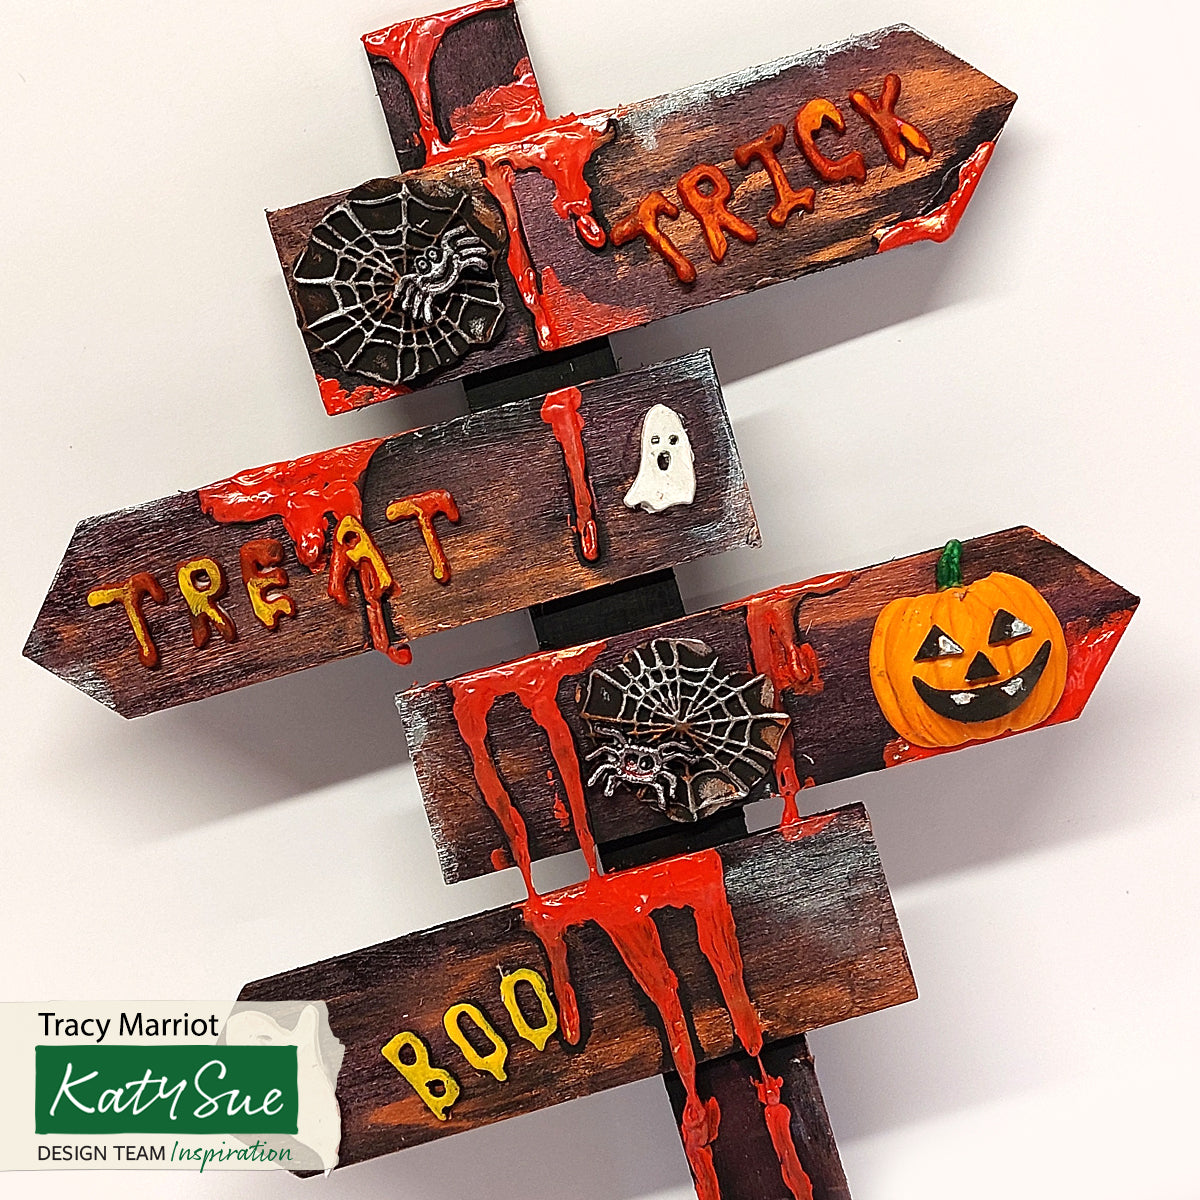
Follow our tutorial to make this CREEPY Halloween sign

Everyone can try this TERRIFYINGLY FUN Halloween craft project! Use Katy Sue's Halloween Silicone Moulds with air drying clay to create a scary sign to hang in your home. Witch Watch craft expert Heather Robertson make creepy lettering, pumpkins, ghosts and spiders to create this frightful decoration!

WATCH how to make your scary sign

What you'll need:

We've listed the products Heather used, or you could choose your own design from our Halloween Moulds Collection.

https://youtu.be/LpJLjoy971Q
Creepy Horror Alphabet Silicone Mould
https://youtu.be/LpJLjoy971Q
Creepy Horror Alphabet Silicone Mould

Creepy Horror Alphabet Silicone Mould

£14.99
https://youtu.be/SDPSmFjHZAo
Pumpkin Face Silicone Mould
CD - An idea using the Pumpkin Face Silicone Mould product
C - An idea using the Pumpkin Face Silicone Mould product
Pumpkin Face Silicone Mould
C - An idea using the Pumpkin Face Silicone Mould product
https://youtu.be/SDPSmFjHZAo
Pumpkin Face Silicone Mould
CD - An idea using the Pumpkin Face Silicone Mould product
C - An idea using the Pumpkin Face Silicone Mould product
Pumpkin Face Silicone Mould
C - An idea using the Pumpkin Face Silicone Mould product

Pumpkin Face Silicone Mould

£9.99
Maple Leaves Silicone Mould
CD - An idea using the Maple Leaves Silicone Moulds product
C - An idea using the Maple Leaves Silicone Moulds product
Maple Leaves Silicone Mould
C - An idea using the Maple Leaves Silicone Moulds product
CD - An idea using the Maple Leaves Silicone Moulds product
Maple Leaves Silicone Mould
CD - An idea using the Maple Leaves Silicone Moulds product
C - An idea using the Maple Leaves Silicone Moulds product
Maple Leaves Silicone Mould
C - An idea using the Maple Leaves Silicone Moulds product
CD - An idea using the Maple Leaves Silicone Moulds product

Maple Leaves Silicone Mould

£11.99
Spiders & Web Silicone Mould
CD - An idea using the Spiders & Web Silicone Mould product
C - An idea using the Spiders & Web Silicone Mould product
CD - An idea using the Spiders & Web Silicone Mould product
Spiders & Web Silicone Mould
CD - An idea using the Spiders & Web Silicone Mould product
C - An idea using the Spiders & Web Silicone Mould product
CD - An idea using the Spiders & Web Silicone Mould product

Spiders & Web Silicone Mould

£11.99
https://youtu.be/PBt87WhpCrs
Ghosts Silicone Mould
CD - An idea using the Ghosts Silicone Mould product
Ghosts Silicone Mould
C - An idea using the Ghosts Silicone Mould product
CD - An idea using the Ghosts Silicone Mould product
Ghosts Silicone Mould
CD - An idea using the Ghosts Silicone Mould product
C - An idea using the Ghosts Silicone Mould product
Ghosts Silicone Mould

Ghosts Silicone Mould

£11.99
White - Hearty Air Drying Modelling Clay 180g

White - Hearty Air Drying Modelling Clay 180g

£11.99
Black - Hearty Air Drying Modeling Clay 50g

Black - Hearty Air Drying Modeling Clay 50g

£4.99
Green - Hearty Air Drying Modelling Clay 50g

Green - Hearty Air Drying Modelling Clay 50g

£4.99
Yellow - Hearty Air Drying Modeling Clay 50g

Yellow - Hearty Air Drying Modeling Clay 50g

£4.99
Orange - Hearty Air Drying Modelling Clay 50g

Orange - Hearty Air Drying Modelling Clay 50g

£4.99

Plus:
• Jute wire
• Plastic coated garden wire
• Acrylic paints in white, black and orange
• Watercolour paints
• Cornflour
• Paint brushes
• Small drill (electric or manual)
• Glue
• Modeling tools (or your fingers!)

Step-by-Step Halloween Project Instructions

STEP 1 – CREEPY LETTERS: Lightly dust the Creepy Horror Alphabet Silicone Mould with cornflour and tap out the excess. Press a small amount of Hearty Air Drying Clay into the mould using your fingers and/or a Dresden/modeling tool. Heather finds that using slightly drier clay works best for this.

Pull the clay away from the edge of the mould, and twist and wriggle the mould gently to release the letters. If they break, just roll the clay back into a ball and remould. Leave to dry on a flat surface.

STEP 2 – PUMPKINS: Lightly dust the Pumpkin Face Silicone Mould with cornflour and tap out the excess. Using Black Hearty Air Drying Clay, mould the eyes, mouths and eyebrows needed for your pumpkin face and leave to dry.

Once the facial features are dry, mix white and orange Hearty Air Drying Clay, together to get the shade of orange you want then press the orange clay into the pumpkin cavity of the mould. Pull the clay away from the edges, and gently twist the mould to release your pumpkin.

Select which facial features you want to use and carefully push each piece into the soft pumpkin, being careful not to distort the shape too much. Using white acrylic paint, add the teeth and eye highlights to the pumpkin faces. Set your pumpkins aside to dry.

Note: Drier clay works best for the thin facial softer clay works features and softer clay works best for the pumpkins. Use one of the eyes to create a round mouth. You can also press letters into your pumpkins to create spooky words.

STEP 3 – GHOSTS: Lightly dust the Ghosts Silicone Mould with cornflour and tap out the excess. Using black, white and yellow Hearty Air Drying Clay mould the ghosts, bats, stars and moons, tearing away any excess clay, and being careful to pull the clay away from the edges, and from the eyes and mouths of the ghosts. Gently twist and fold the mould to release your pieces and set aside to dry.

Note: It is best to mould and release one piece at a time for easier release and to avoid distorting the shape.

STEP 4 – SPIDERS: Lightly dust the Spiders & Web Silicone Mould with cornflour and tap out the excess. Roll out a sheet of Hearty Air Drying Clay and cut away any excess. Gently press the clay into the mould, being careful to fill all the cavities. You can gently roll the clay flat, but be careful not to stretch the clay and distort the shape.

Turn it over and gently remove the mould buy rolling it off the clay on a flat surface. Cut away the excess clay with scissors or a cutting wheel. Leave to dry on a flat surface.

Press a small amount of Hearty Air Drying Clay into the spider cavities of the mould using your fingers and /or dresden/modelling tool. Heather finds that using slightly drier clay works best for this. Pull the clay away from the edge of the mould, and twist and wriggle the mould gently to release the spiders. If they break, just roll the clay back into a ball and remould. Leave to dry.

STEP 5 – MDF PLAQUES: Choose a large and small MDF Nesting Plaque and paint each one with a base layer of white acrylic paint, gesso or primer. Once dry, sponge paint each one with acrylic paints in the colours of your choice. Heather has chosen to paint the top plaque in black and the bottom plaque in bright orange. She has left the centre of the bottom plaque unpainted as this is where the glue will go. Leave to dry.

To add the spider web to your MDF, paint some white acrylic paint onto a tile, plate or non-absorbent flat surface, and press your spiderweb stamp onto the paint. Alternatively, you could use a stamp pad or carefully paint the clay onto the stamp, being careful to only paint the raised areas. Press this carefully and firmly onto your MDF and remove to leave the web print. Leave to dry.

Once dry, glue the two plaques together with tacky glue or wood glue.

Note: If your spiderweb impression is too bright or strong, lightly paint some black paint over the top in a few places to tone down and fade the image.

STEP 6 – LEAVES AND WIRE CURLS: Lightly dust the Maple Leaves Silicone Mould with cornflour and tap out the excess. Press light Green Hearty Air Drying Clay into the mould using your fingers. Pull the clay away from the edge of the mould, and gently twist and fold the mould to release your leaves.

Note: Heather often makes the leaves and sticks them to her projects before they dry, so that she can bend and squash them to fit where she wants them to go.

To create wire pumpkin curls, wrap some wire around a knitting needle, pencil or paint brush, and then remove. Stretch and twist to the desired shape. Heather has used 20-gauge florist wire, but softer garden wire or craft wire also works well.

STEP 7 – ASSEMBLY: Once all your pieces are dry, play around and plan where you want each piece to go. When you are happy with your layout, then start to glue everything in place with craft/tacky/wood glue. Heather has also used some extra heavy gel medium where she wanted a thicker adhesive. Silicone glue can also be used.

Extra leaves can be made and stuck into place at this point. Push the curly wires into place while the thick glue is still wet.

Play around with the word placement, and if you’re not happy with it, change it. Leave to fully dry.

STEP 8 – WIRE HANGER: Heather has used crafting jute wire and plastic-coated garden wire to create the hanger. Drill two small holes at the top of your Halloween sign. Heather has used a small manual pin drill.

Make a long curl of green garden wire. Thread the jute wire through one of the holes in your sign and then thread the wire curl onto it. Thread the jute wire through the other hole and decide how long you want your hanger to be. Cut it to the desired length, wrap it around itself to secure it and remove any excess wire with wire cutters.

Stretch out your wire curl and if it is too long, remove what you don’t need. Uncurl some of the wire curl and bend it to the desired shape. Remove any excess wire with some wire cutters.

STEP 9 – FINAL PAINTING: Heather has used watercolour paints in orange and dark green to add extra depth to the design.

Paint the pumpkins with a darker shade of orange, and then wipe away the paint from the surface with a wet wipe or damp towel, so that the paint only remains in the crevices. Do the same with the leaves, using a dark green. You can also add a splash of orange in a few places too. Leave to dry and hang in place.

You've made your creepy Halloween sign!

Show us your CREEPY CREATIONS! Join the Katy Sue Craft Creations Facebook Group and share your frightful photos!

BONUS Ghost pattern tutorial!

Lightly dust the Ghosts Silicone Mould with cornflour and tap out the excess.

Using black, white and yellow Hearty Air Drying Clay fill each ghost, star, moon and bat cavity.

Tear away any excess clay, and be careful to pull the clay away from the edge of the mould as well as the eyes and mouths of the ghosts.

Roll out a sheet of clay in a contrasting colour. Heather has used grey with a hint of blue.

Press the mould with the filled cavities firmly onto the rolled-out sheet of clay and cut away any excess. Turn it over and gently press the clay down to ensure that the shapes already in the mould stick to the sheet of clay. Turn back over onto a flat surface and carefully peel the mould away to reveal your multicoloured sheet. Cut away any excess clay and leave your sheet to dry on a flat surface.

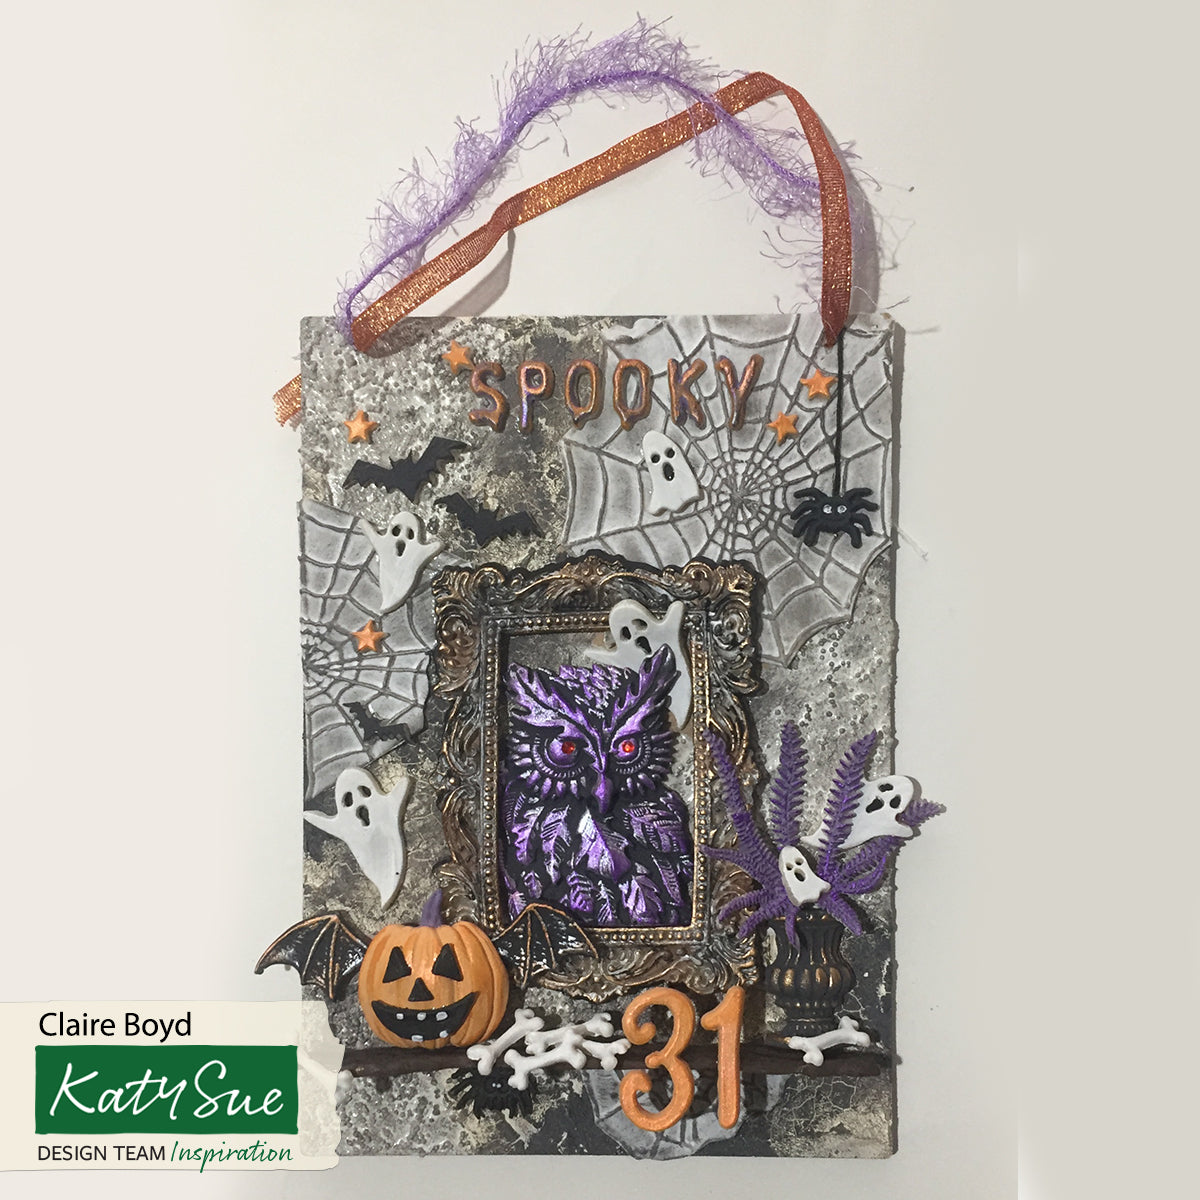
Create a haunted house masterpiece by using Katy Sue Vintage Frame Moulds.

More frightful craft ideas for a creative Halloween...

You might also like...

Autumn Swag Silicone Mould

Autumn Swag Silicone Mould

£14.99
Miniature Halloween Silicone Mould

Miniature Halloween Silicone Mould

£9.99
https://www.youtube.com/watch?v=PviJJg-mWJw
Flower Pro Small Antlers Silicone Mould
CD - Nicholas Lodge Small Antlers Mould
Flower Pro Small Antlers Silicone Mould
CD - Nicholas Lodge Small Antlers Mould
Flower Pro Small Antlers Silicone Mould
CD - Nicholas Lodge Small Antlers Mould
Flower Pro Small Antlers Silicone Mould
C - Nicholas Lodge Small Antlers Mould

Flower Pro Small Antlers Silicone Mould

£11.99
Flower Pro Small Log Slice Silicone Mould

Flower Pro Small Log Slice Silicone Mould

£11.99

Net Orders Checkout

Item Price Qty Total
Subtotal £0.00
Shipping
Total

Shipping Address

Shipping Methods