
How to create an Owl Journal using the Flower Pro Wedding Foliage mould by Design Team member Karen Seal
We love the creative way in which our talented Design Team members use our moulds to create incredible craft projects. Recently we were blown away when we saw Design Team member Karen Seal's fabulous owl journal, with the owl created using the new Flower Pro Wedding Foliage mould. We knew that it would be a craft that many of you would love to create for yourselves, so Karen has kindly put together this in-depth, step-by-step tutorial to show you how she did it!

The supplies needed to create your own owl journal:
Flower Pro Wedding Foliage Mould
A5 Journal Book by Katy Sue Designs
Owl Template (click to download Karen's template)
Black polymer clay (approximately one and a half 2oz packets)
2 x 12mm glass flat back cabochons
Black and gold acrylic paint
Mica metallic powders
Smooth A5 sheet of white card stock
Distress inks (I used mustard seed, picked raspberry, peacock feathers and faded jeans).
PVA and superglue gel
A note from Karen before you get started, "This project is made using polymer clay. When working with polymer clay your work area should be covered. Uncured clay may damage unprotected furniture or finished surfaces. Start with clean hands, unwrap and knead the clay until soft, smooth and doesn’t crack when folded in half. This is called conditioning the clay. The clay may colour your hands, but it will come off with a baby wipe or soap and water. Polymer clay is nontoxic and can be baked safely in a normal oven at the temperature recommended on the packet for the particular clay you’ve used."
A guide to using the Flower Pro Wedding Foliage mould:
Method
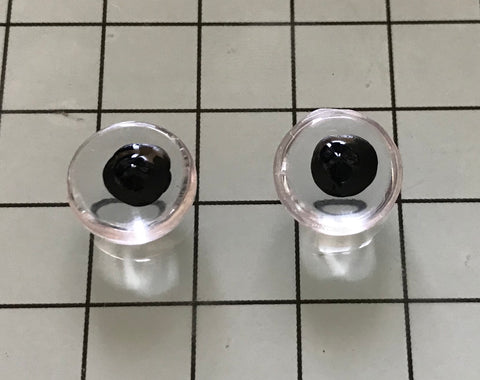
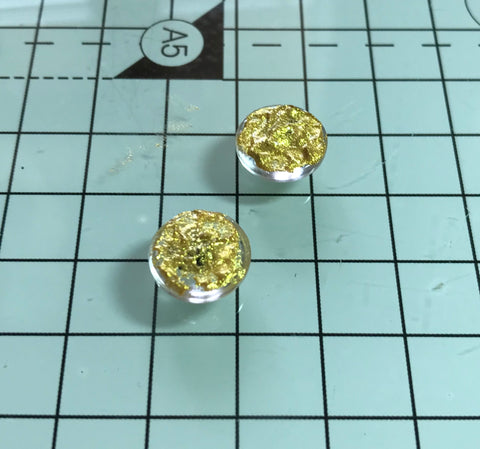
1. Take two 12mm flat-backed glass cabochons and using a ball tool paint black acrylic dots in the centre. Leave to dry and once dry paint over the back with gold acrylic paint. Leave to dry.
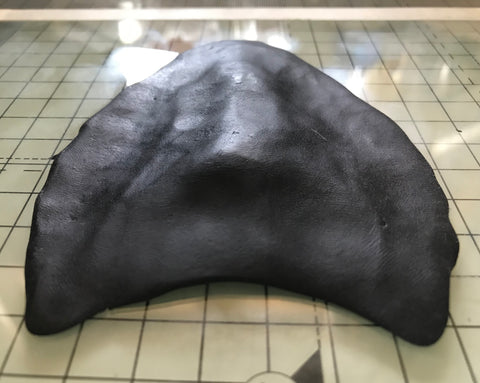
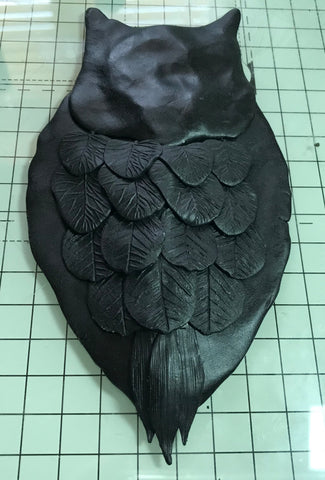
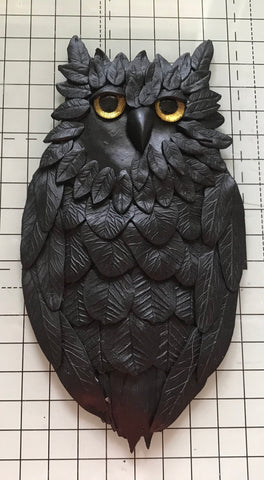
2. Take ½ pack of black clay and “condition it” (as above in Karen's note before the method). The clay has to be cooked in an oven, so I build my owl on a glass mat. Roll into a cylinder and lay down the middle of the owl body template.
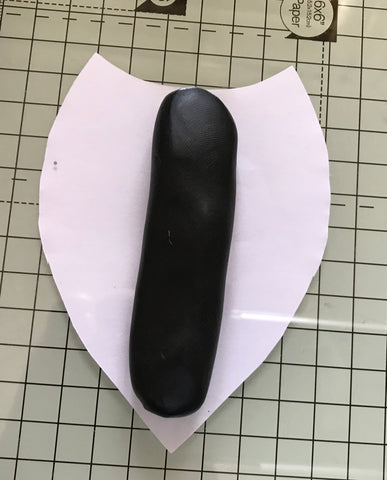
3. Flatten out the clay from the middle towards the outside, leaving a domed shape in the middle for the breast of the owl.
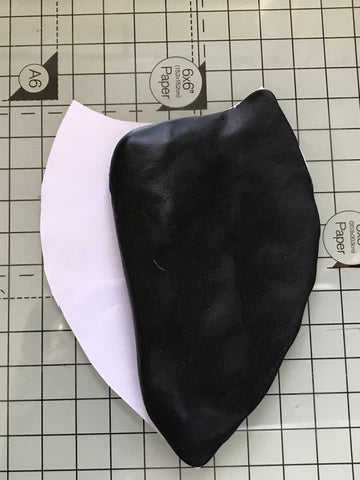
4. Flatten area where the head would overlap the body. Once you're happy with the shape, remove the paper template from underneath.
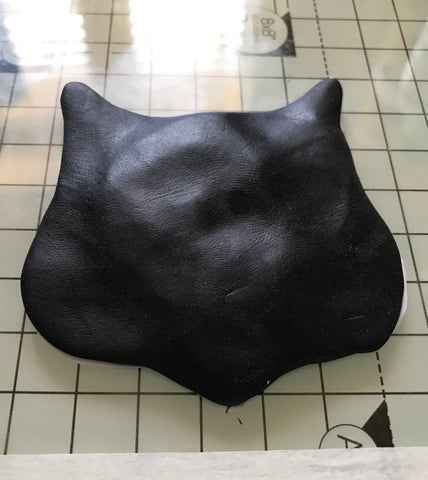
5. Take ¼ of a packet of black clay and condition (as above in Karen's note before the method). Roll into a ball and then flatten it out to the shape of the head template. Again, leave slightly domed in the middle of the face. Once you're happy with the shape, remove the paper template from underneath.
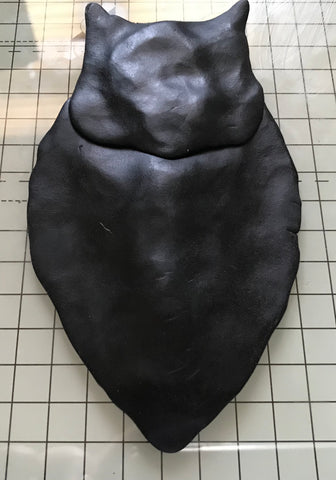
6. Place head on top of the body and lightly press into place.
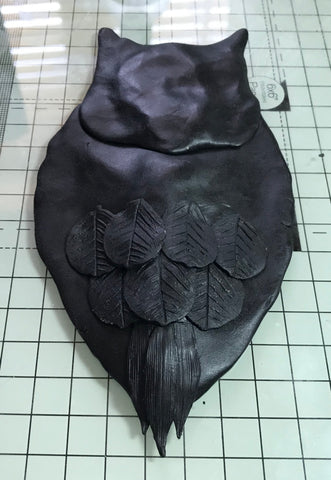
7. Condition the rest of the clay, as this will now be used in small amounts to make the leaves with the Flower Pro Wedding Foliage mould to make the feathers for the owl. Start from the bottom of the owl and work upwards. Press the leaves slightly when placing them to make sure they adhere but not so much so that you lose the veining.
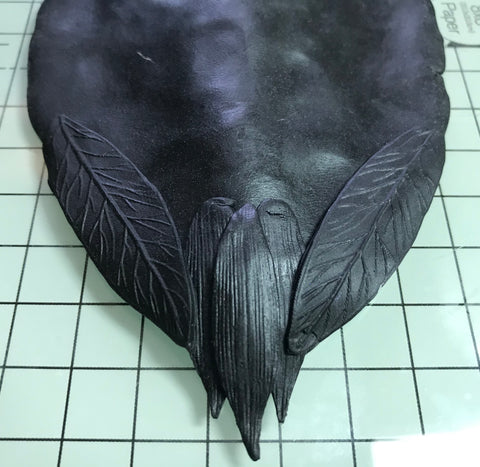
8. For the tail make three of the smallest Italian Ruscus leaves and place at the bottom of the owl.

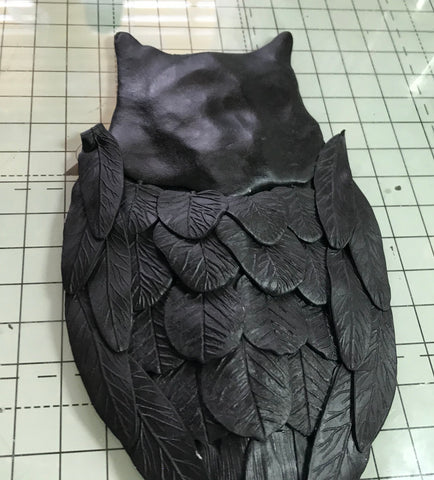
9. Make three of the second smallest silver dollar leaves and four of the smallest silver dollar leaves and arrange on the tummy of the owl.
10. Make four of each of the smallest and second smallest Baby Blue Eucalyptus leaves and arrange on the breast of the owl. This now completes the breast of the owl.
11. Make two of the largest Seeded Eucalyptus leaves and place onto the body of the owl overlapping the breast leaves that you’ve put on, again work from the bottom. (This photo shows the placement but I took it before I’d completed the chest.)
12. Make eight of the smaller seeded eucalyptus leaves and arrange from the bottom upwards on the two wings.
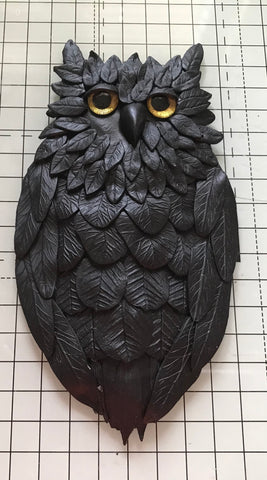
13. Make a beak freehand with some polymer clay and place it on the face along with the two eyes you made earlier in Step 1. Start to frame the face with approximately 25 of the largest English boxwood leaves. Another two of these leaves can be used as eyelids for the owl.
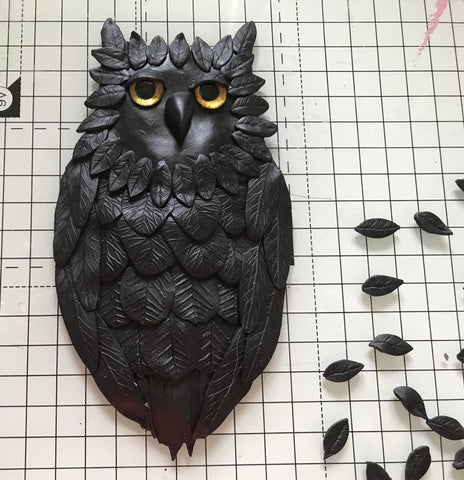
14. Make approximately 24 of the smallest boxwood leaves and arrange around the owls face to fill in the remaining gaps.
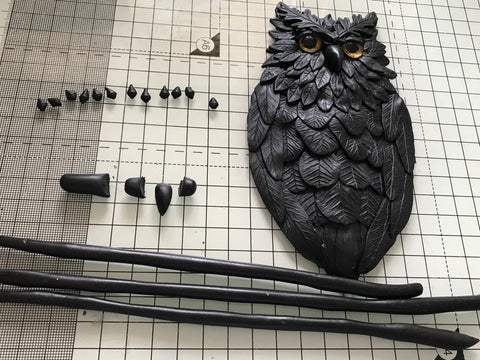
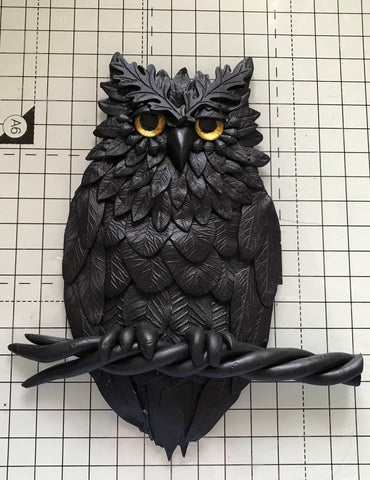
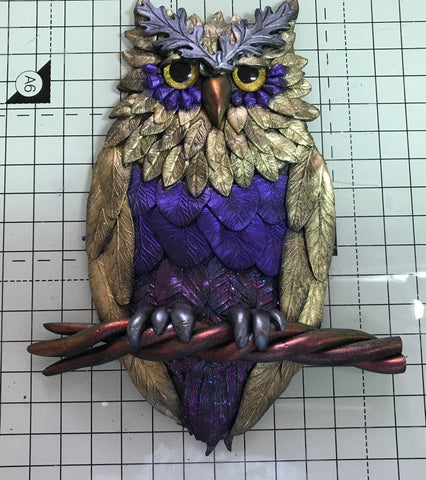
15. Make 12 of the seeds and place six of each around each eye to frame the eye. Then roll a sausage of clay and cut into six pieces to make some freehand toes. Lastly roll three long strips of polymer and twist them together to form a twig. Place this across the bottom of the owl and attach his toes. Cut the branch to the length you desire.
16. Lastly make two of the smallest Dusty Miller leaves and use as his eyebrows.
17. You can now use the mica powders to dust your owl and he is then ready to bake. The clay I use requires 30 minutes at 130°C, but your packet should have its own instructions. Once baked, leave to totally cool before touching. Once cold, use a blade to release the owl from the glass mat.
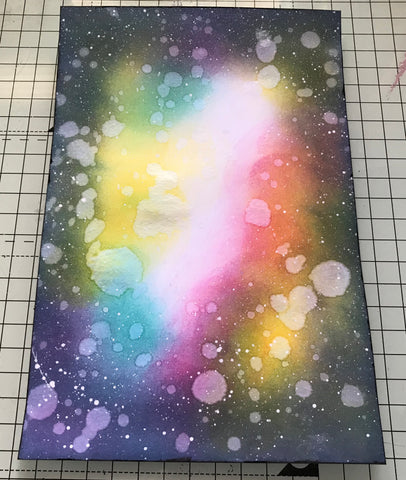
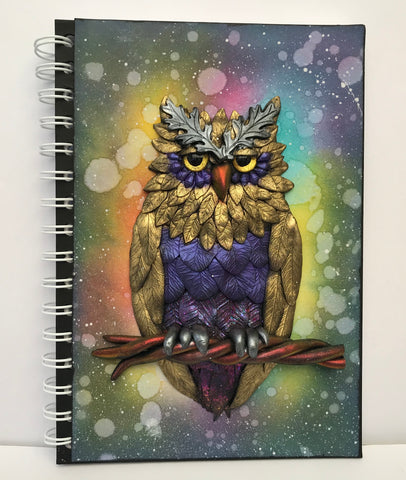
18. Lastly I made a cosmic background using white card, distress ink pads, water and splashes of white acrylic paint. I covered the A5 journal with this and stuck the owl on the front with some superglue gel.
And here is the finished owl journal!
This owl can obviously be made in lots of mediums and I look forward to seeing what you come up with. Any questions please don’t hesitate to ask.
You may also like to read:
How to use the Medium Log Slice mould with Chef Nicholas Lodge
How to create cute character plant pots
Leave a comment