
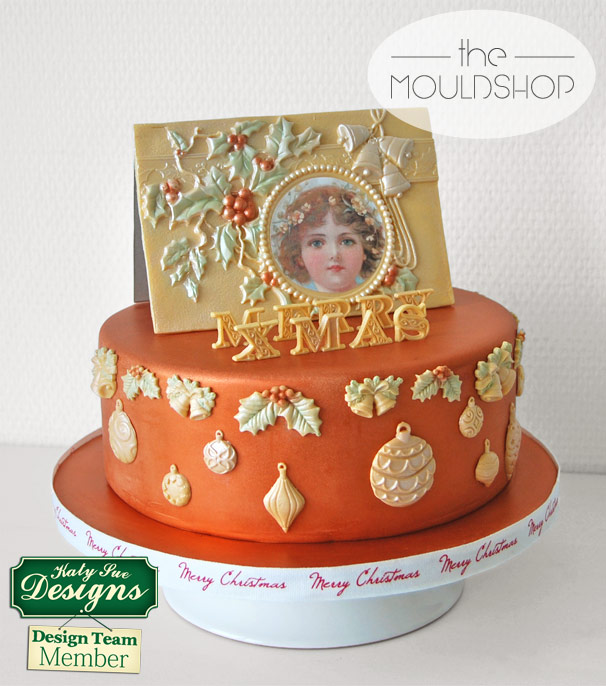
Christmas Card Cake by Barbara from the Mouldshop!
Good day sweet crafters! My name is Barbara
Hoogendoorn. I’m from the Netherlands and I’m the owner of www.theMouldshop.com. You might guess why I sell moulds? It’s because I LOVE moulds! And
Katy Sue Design moulds are absolutely fabulous to work with! I’m so very proud
and honoured to be part of the Design Team… Now then, I created this
Christmas cake not so very long ago and let me tell you how I did that:
The Cake
itself:
itself:
What
you will need:
you will need:
·
White
fondant
White
fondant
·
EdAble Art
Iced Orange
EdAble Art
Iced Orange
·
Wide brush
Wide brush
How
you do it:
you do it:
Cover your cake with white fondant just like
you’re used to. Let the fondant dry. Put some EdAble Art Iced Orange powder
colour in a small bowl, don’t be cheap with it. Now take your wide brush and make sure
it’s thoroughly filled with icy orange powder.
Colour your cake with round movements. Just keep adding Iced Orange
until your cake is completely and evenly coloured.
Decorations
on the side of the cake:
on the side of the cake:
What you need:
·
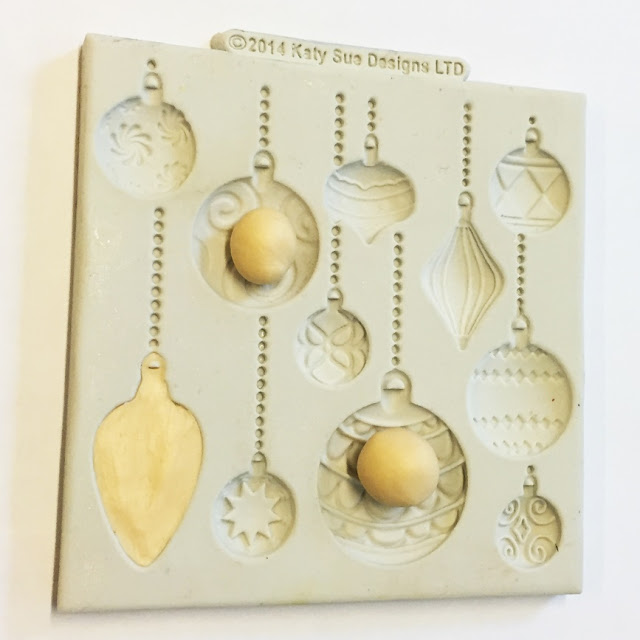
Katy Sue
Designs Christmas Baubles
Katy Sue
Designs Christmas Baubles
·
Katy Sue
Designs Christmas Small Bells
Katy Sue
Designs Christmas Small Bells
·
Katy Sue
Designs Holly Trio
Katy Sue
Designs Holly Trio
·
Cornflower
Cornflower
·
White fondant
White fondant
·
Wilton colouring
gel Ivory (and optional Wilton Golden Yellow)
Wilton colouring
gel Ivory (and optional Wilton Golden Yellow)
·
Colour
Dust Cream Pearl
Colour
Dust Cream Pearl
·
EdAble Art
Iced Pine
EdAble Art
Iced Pine
·
Paletknife
Paletknife
·
Wide brush
Wide brush
·
Several fine
brushes
Several fine
brushes
·
Edible
glue
Edible
glue
How you do it:
Knead your fondant. Add small amounts of Wilton Ivory until you
think the colour is right, not too light, but definitely not too dark. If you
like you can add a very small amount of Wilton Golden Yellow as well.
think the colour is right, not too light, but definitely not too dark. If you
like you can add a very small amount of Wilton Golden Yellow as well.
Top Tip: make enough for all your
decorations at once , even for the card and the letters that go on top. This
way you won’t end up with decorations that are different colours! That would be a
pity after all your hard work.
decorations at once , even for the card and the letters that go on top. This
way you won’t end up with decorations that are different colours! That would be a
pity after all your hard work.
Now, dust your mould with some cornflower and
tap it upside down on your workspace to remove any excess cornflower. Make a
small ball of your fondant and roll it between the palms of your hand to prevent any cracks. Push the ball into your mould and
press.
tap it upside down on your workspace to remove any excess cornflower. Make a
small ball of your fondant and roll it between the palms of your hand to prevent any cracks. Push the ball into your mould and
press.
Top Tip: If the
fondant is sticky use a small piece of food safe plastic to cover your finger. If
your fondant ball was too big, use a palette knife to cut away any excess fondant.
Always cut from the middle to the edge of your decoration. Otherwise you may
remove your decoration from the mould prematurely.
fondant is sticky use a small piece of food safe plastic to cover your finger. If
your fondant ball was too big, use a palette knife to cut away any excess fondant.
Always cut from the middle to the edge of your decoration. Otherwise you may
remove your decoration from the mould prematurely.
Turn your mould around and push lightly until
your decoration falls gently on your workspace. Repeat this process until you
have enough Baubles, Holly in 2 different sizes and Christmas Bells in 2
different sizes to cover the complete side of your cake. To finish your decorations dust them with
Cream Pearl Colour Dust using a wide brush. Be careful, don’t overdo it. Now take
the smaller brush and dust the holly leaves with Iced pine and the berries with
Iced Orange. Use some edible glue to immediately stick the decorations to the
cake. If you leave them to dry first they won’t follow the curve in your cake
any more.
The
Alphabet:
Alphabet:
What
you need:
you need:
·
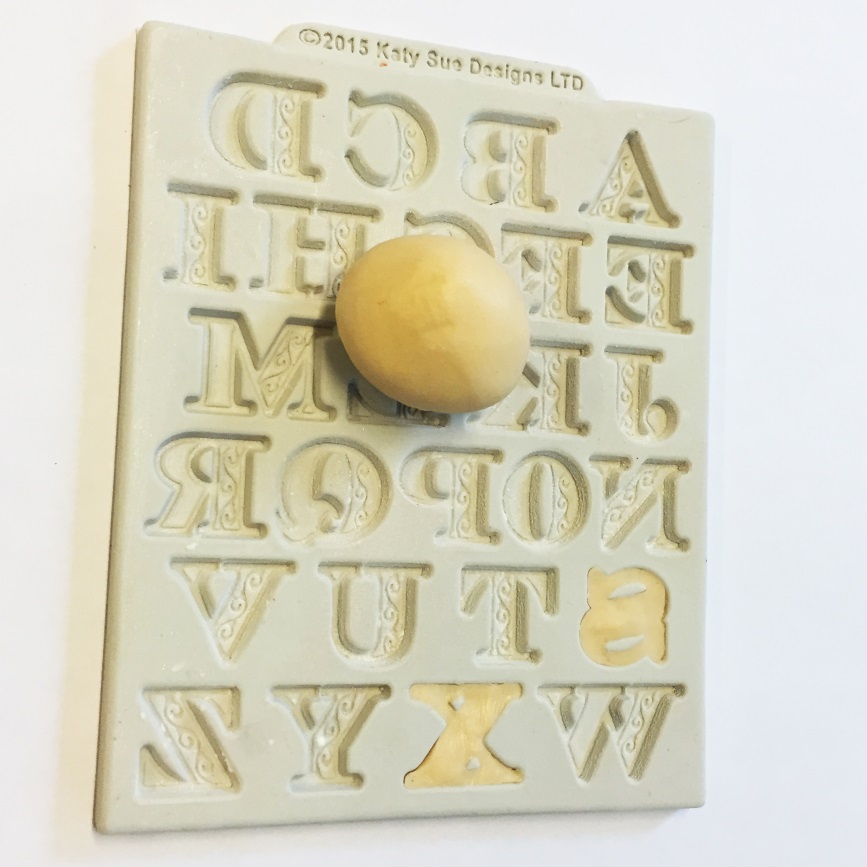
Katy Sue
Designs Manuscript Alphabet
Katy Sue
Designs Manuscript Alphabet
·
Cornflower
Cornflower
·
Fondant , white,
Coloured with Wilton Ivory
Fondant , white,
Coloured with Wilton Ivory
·
Tylo
Powder
Tylo
Powder
·
Colour
dust Cream Pearl
Colour
dust Cream Pearl
·
Edible
glue
Edible
glue
How
you do it:
you do it:
The letters are made the same as the other
decorations, only you strengthen the fondant with some Tylo powder and you
leave the letters to dry at least 24 hours before you glue them onto your cake
.
decorations, only you strengthen the fondant with some Tylo powder and you
leave the letters to dry at least 24 hours before you glue them onto your cake
.
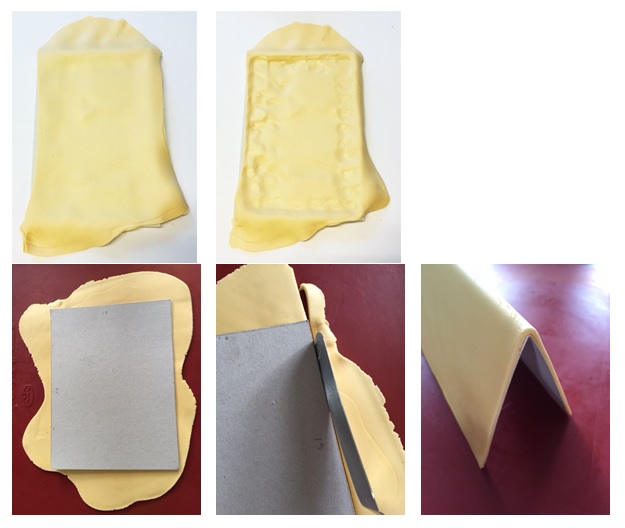
The edible card:
What you need:
· Cornflower
· Fondant , white, Coloured with Wilton Ivory
· Tylo Powder
· Colour dust Cream Pearl
· Edible glue
· Roling pin
· Paletknife
· Cardboard template 13×15 cm
· EdAble Art Iced Orange
· EdAble Art Iced Pine
· Wide brush
· Fine brush
· Scissors
· Edible glue
What you do:
Knead your fondant with some Tylo powder. Dust your mould
with some cornflower and tap any excess out. Roll out a piece of fondant and
put over your mould. Use your finger to push it in. Cut any excess fondant with
the palette knife. Even the back of your edible card by rolling over it with your
rolling pin. Make sure the edges are neat before you empty your mould. Leave to
dry completely for at least 24 hours.
Now, for the cardholder you need a
template that’s approximately 13×15 cm. Roll
out another piece of fondant and cut out the template. Fold and leave to dry
(24 hours) on top of your template which is fold as well. If the fondant is to
heavy use some tape to prevent the template from falling flat on your working
space. Just tape the two ends together with 3 or 4 centimetres in between.
Of
course there is also a very nice video in which Katy Sue Designs shows you how
to work with the Edible Card mould. Check it out here:
course there is also a very nice video in which Katy Sue Designs shows you how
to work with the Edible Card mould. Check it out here:
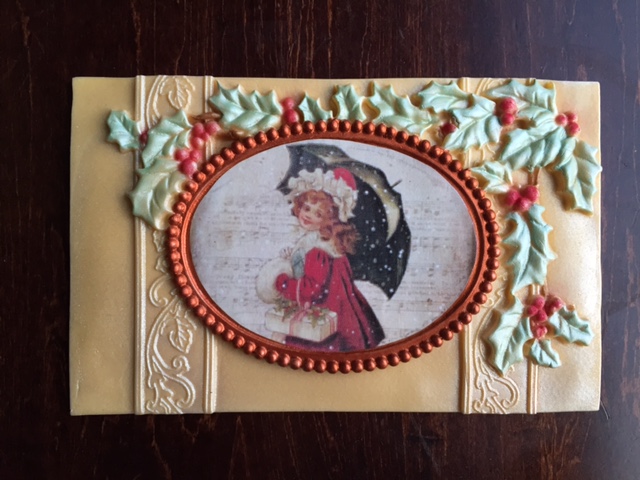
Now you need a nice picture to fit the frame! Print it on edible paper (or
normal paper if you’re not planning to eat the card) and cut it out. Use some
edible glue or piping gel to glue it in its place.
normal paper if you’re not planning to eat the card) and cut it out. Use some
edible glue or piping gel to glue it in its place.
TopTip: check out our website for some free downloadable
examples, the image on this cake is among them:
http://www.themouldshop.com/en/printables.
When your card is completely dry dust it with Cream Pearl
Colour dust. Concentrate on the higher portions of the card like the bells, so
don’t dust excessively on the lower bits. Again, use the Iced Pine to dust the
holly leaves lightly and the Iced Orange for dusting the berries.
Colour dust. Concentrate on the higher portions of the card like the bells, so
don’t dust excessively on the lower bits. Again, use the Iced Pine to dust the
holly leaves lightly and the Iced Orange for dusting the berries.

Mix some fondant with some water, use royal icing or piping
gel to glue your card to its holder and put on top of your cake. Now you’re
done! Enjoy all the OHHHHHH’s and AHHHHHH’s at your Christmas dinner ;)!
gel to glue your card to its holder and put on top of your cake. Now you’re
done! Enjoy all the OHHHHHH’s and AHHHHHH’s at your Christmas dinner ;)!
Leave a comment